Solaire
-
Posts
11 -
Joined
-
Last visited
Other groups
Year 01

1 Follower

Solaire's Achievements
")
Inhabitant (2/293)
-
 Thanks ! I´ve always dreamed of having the exact mata design but with maximal articulations ^^ . It´s not a lot but getting closer to that is Nice : )
 -
Man i wish it was official X) It hurt me too but ... elbows !
-
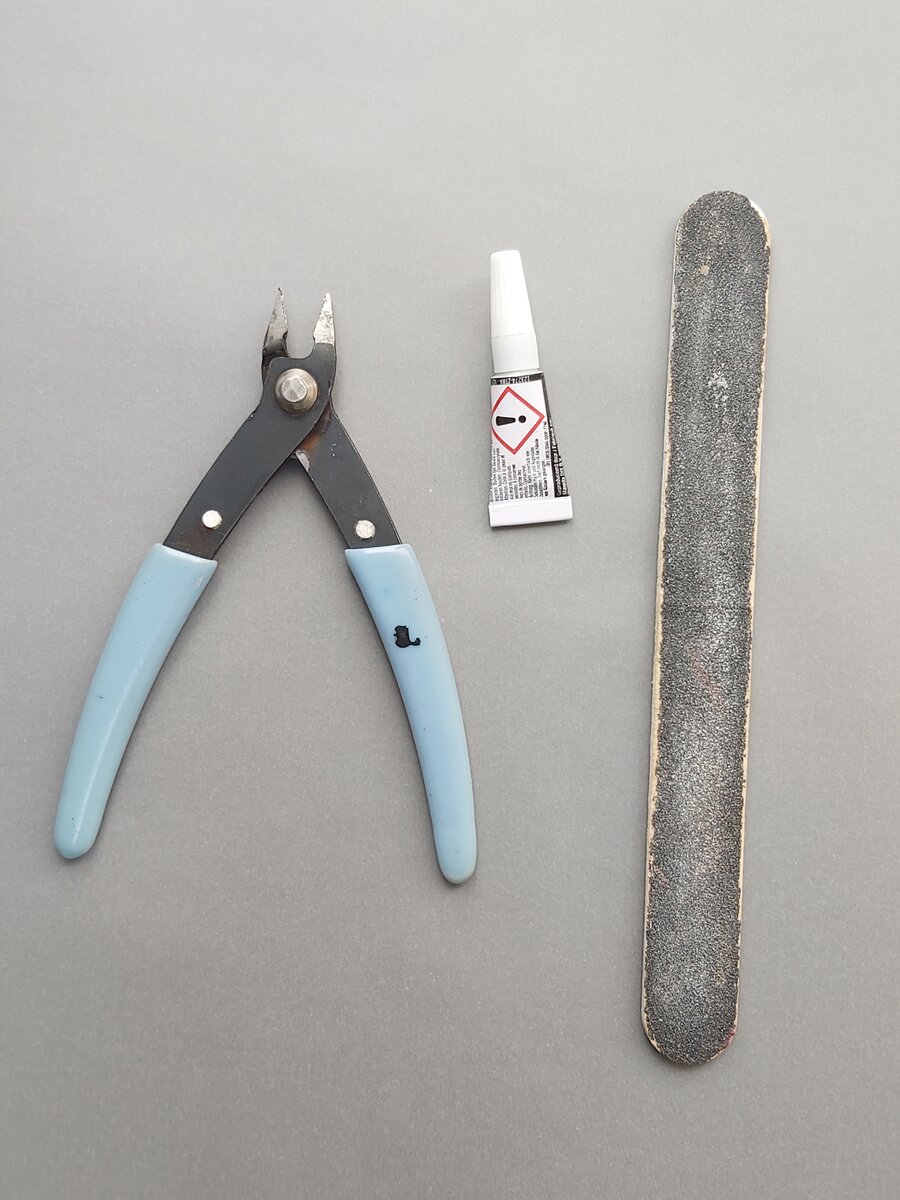
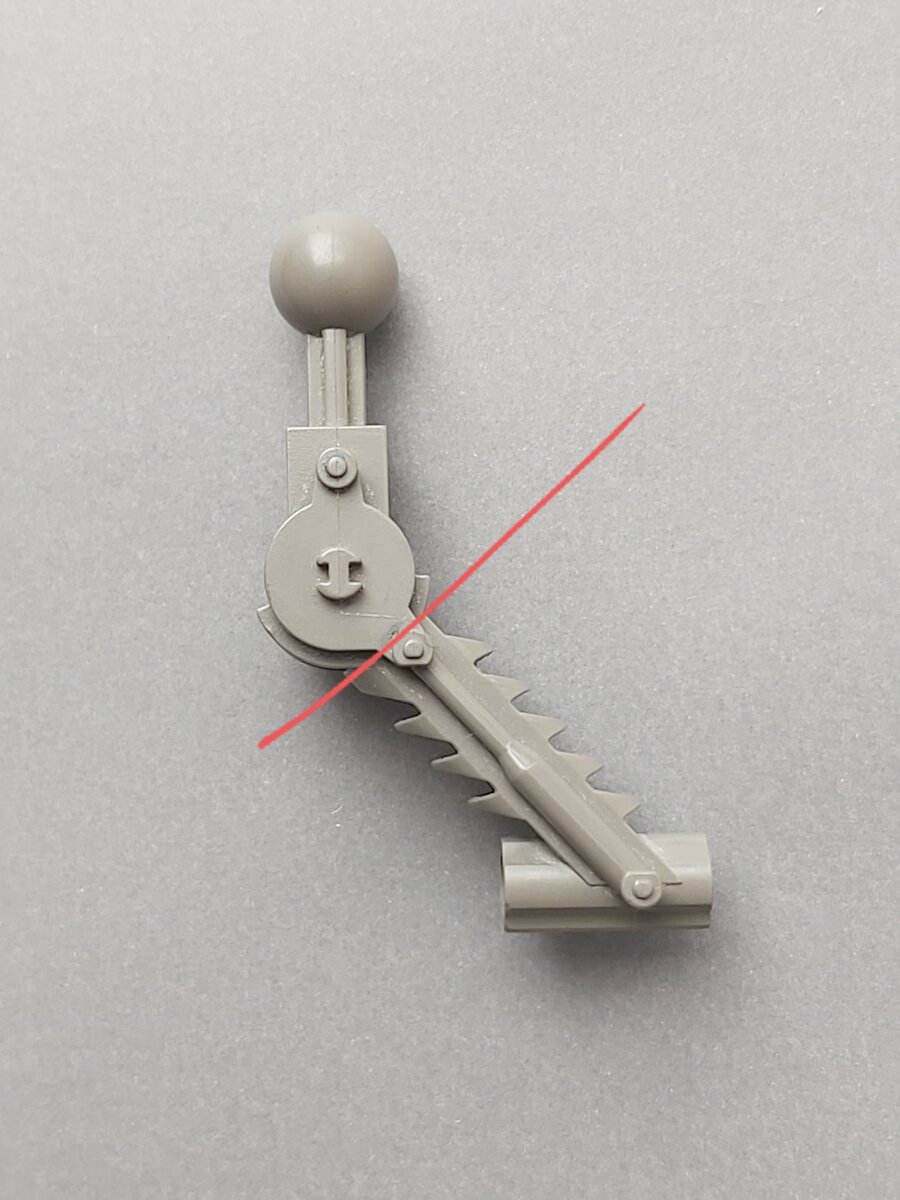
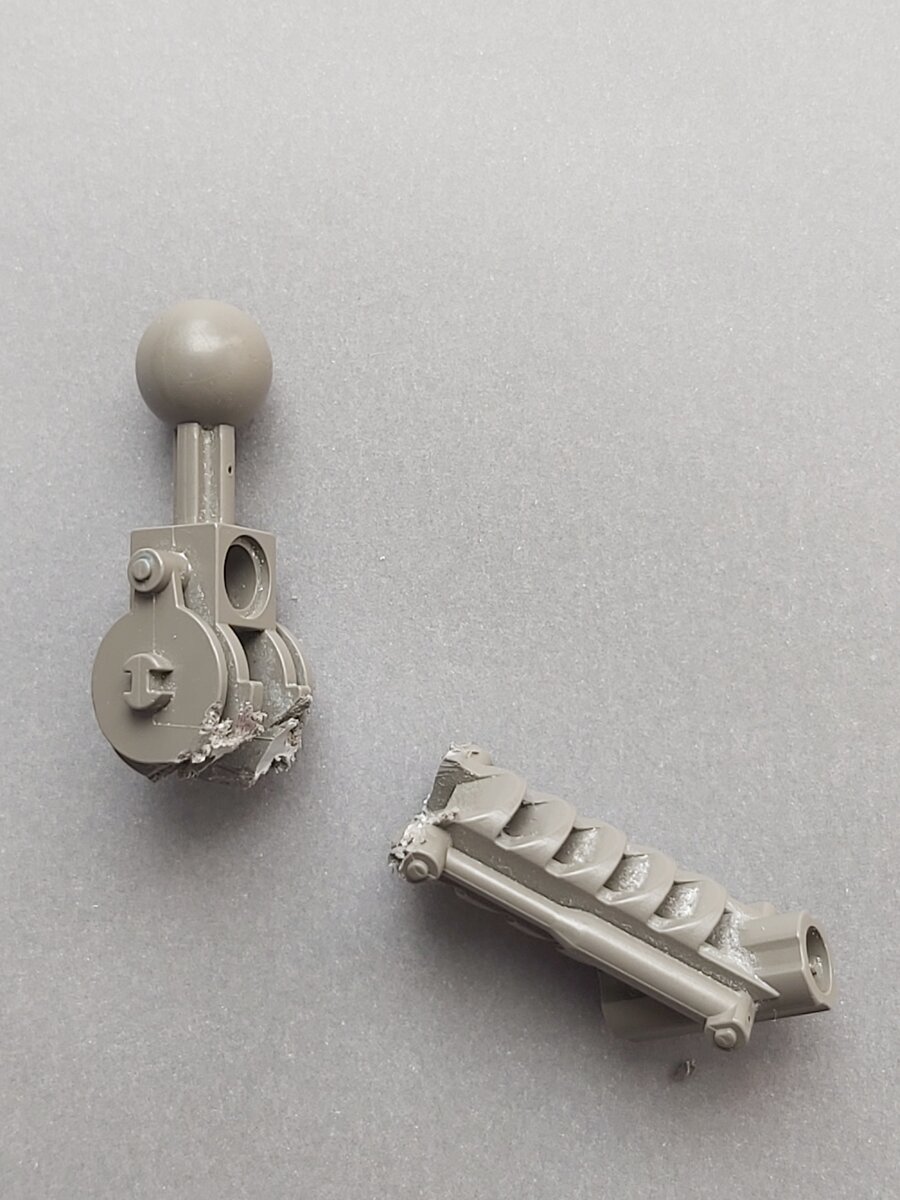
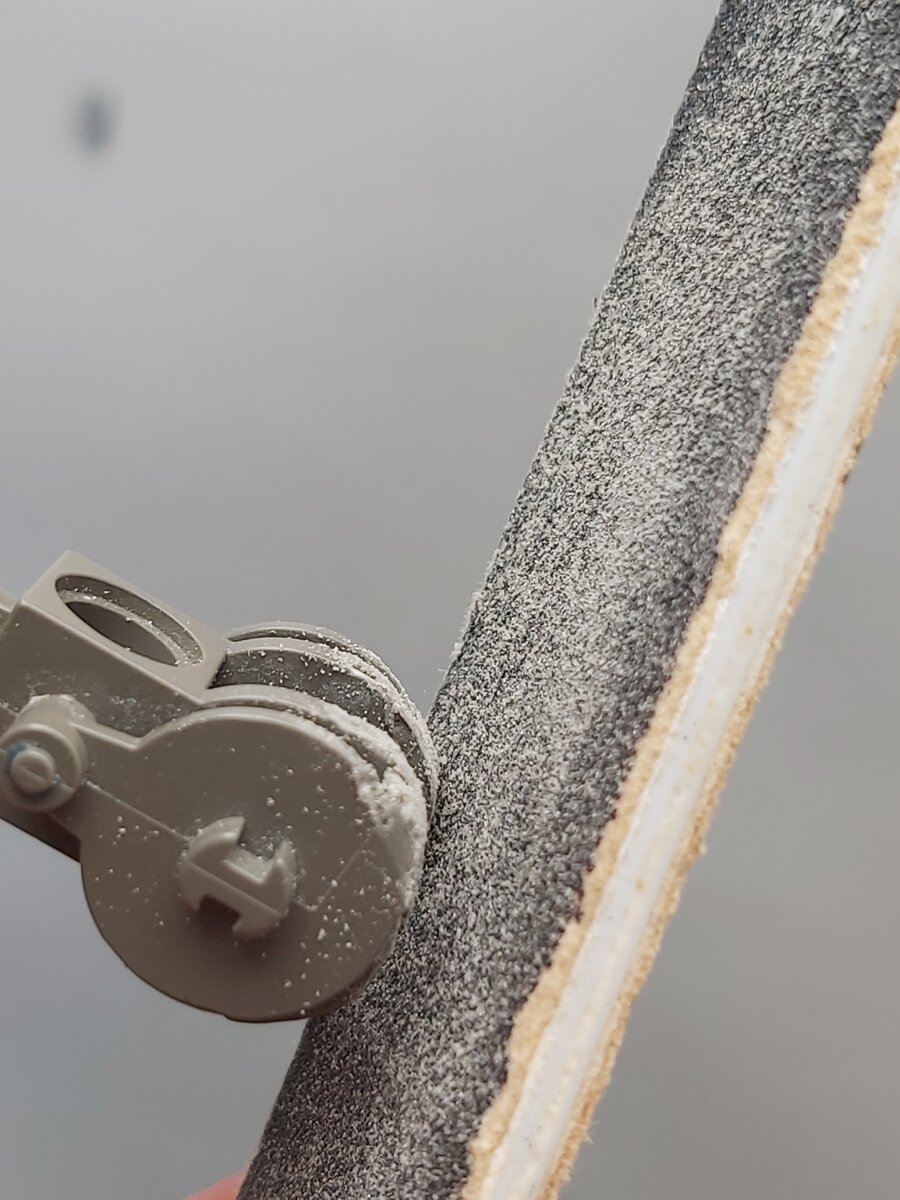
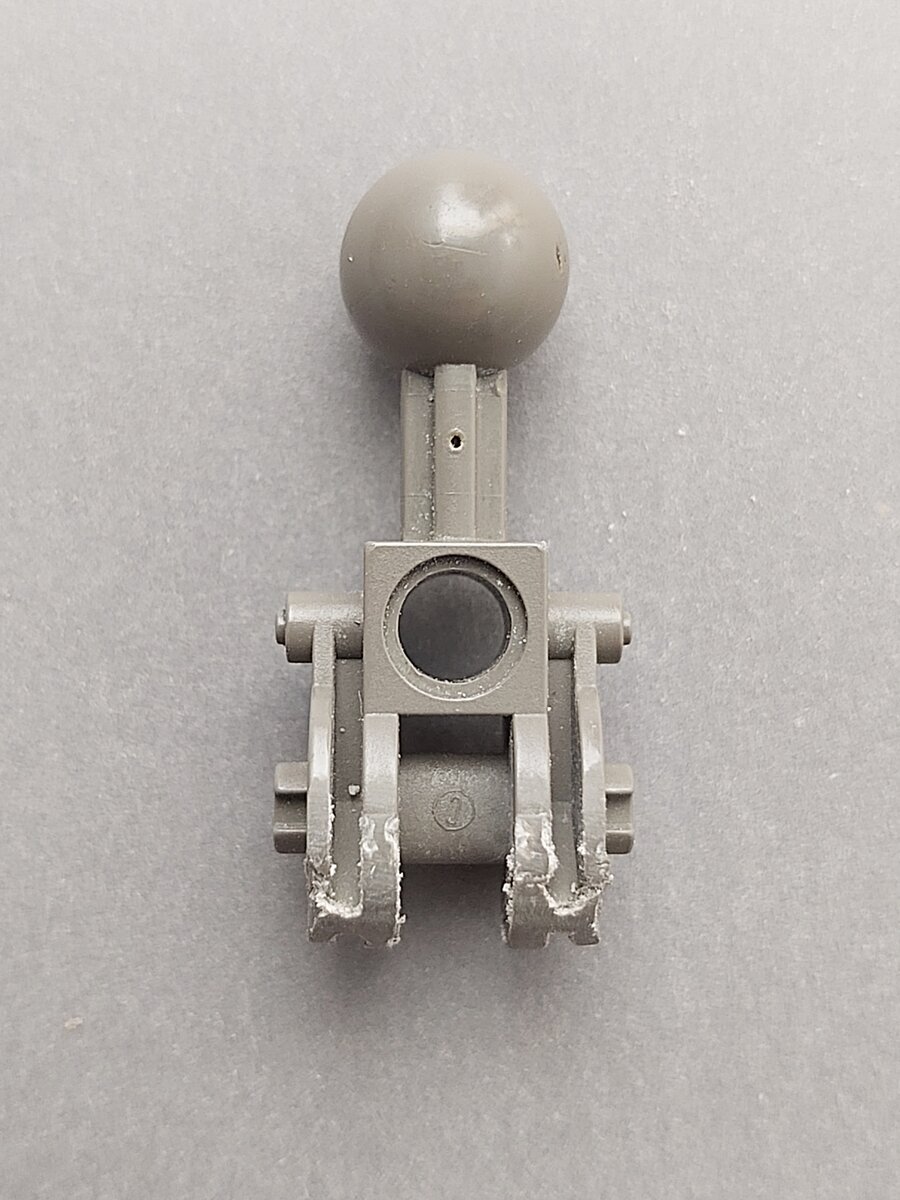
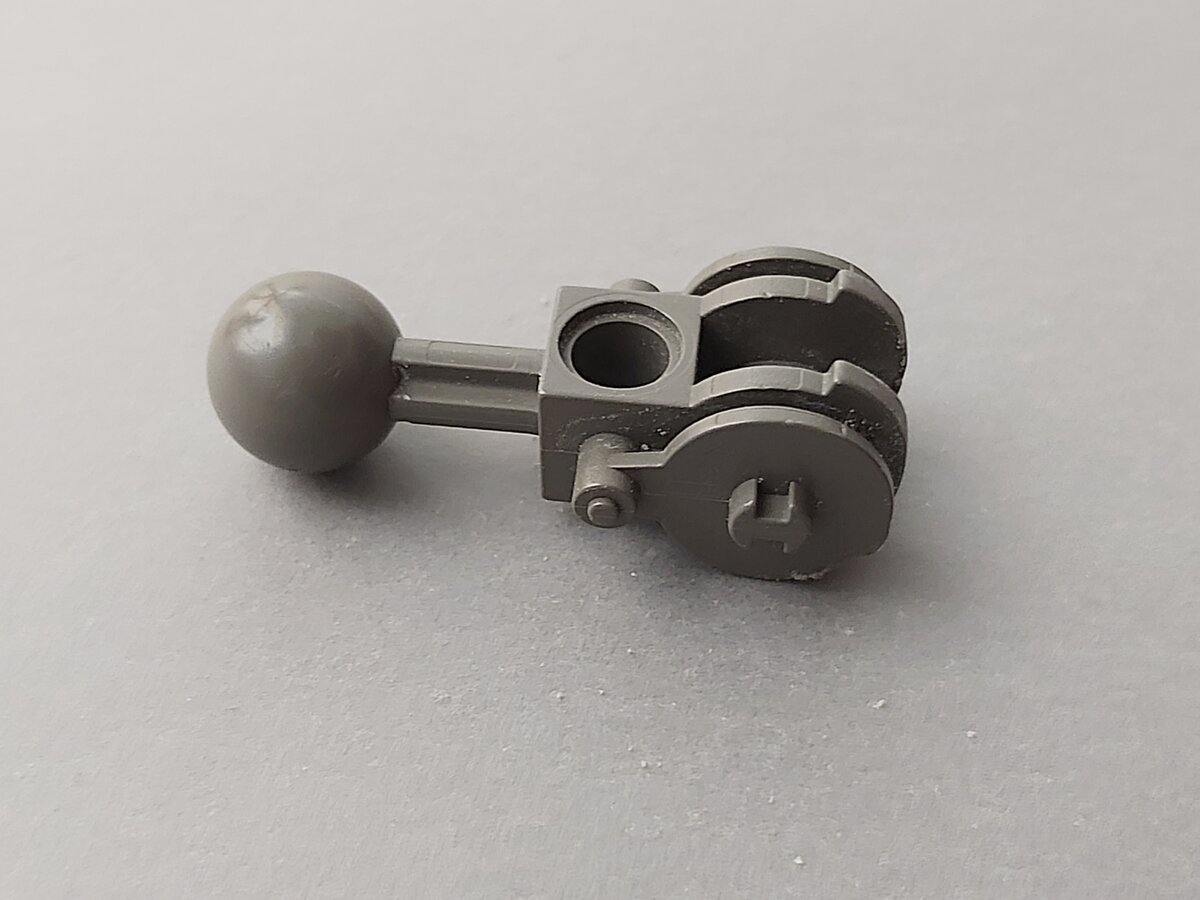
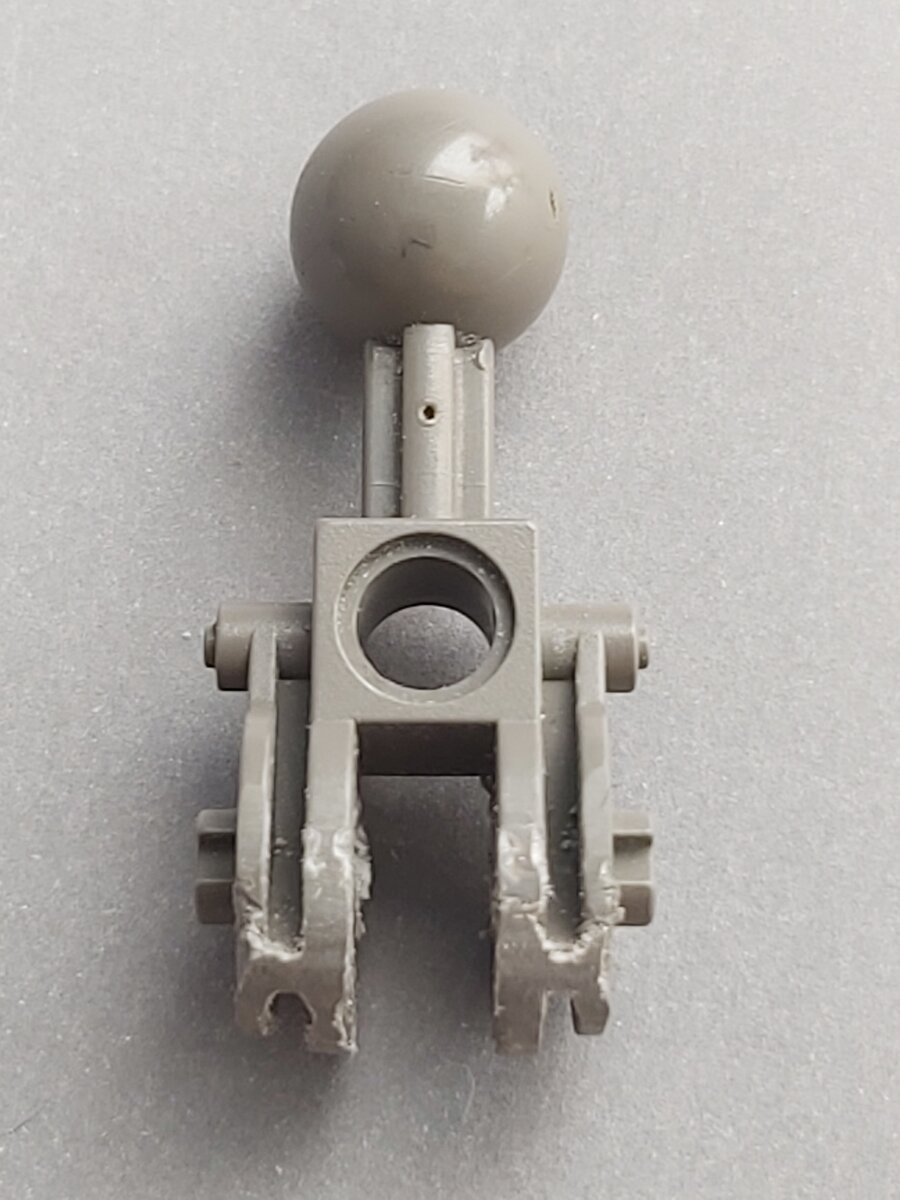
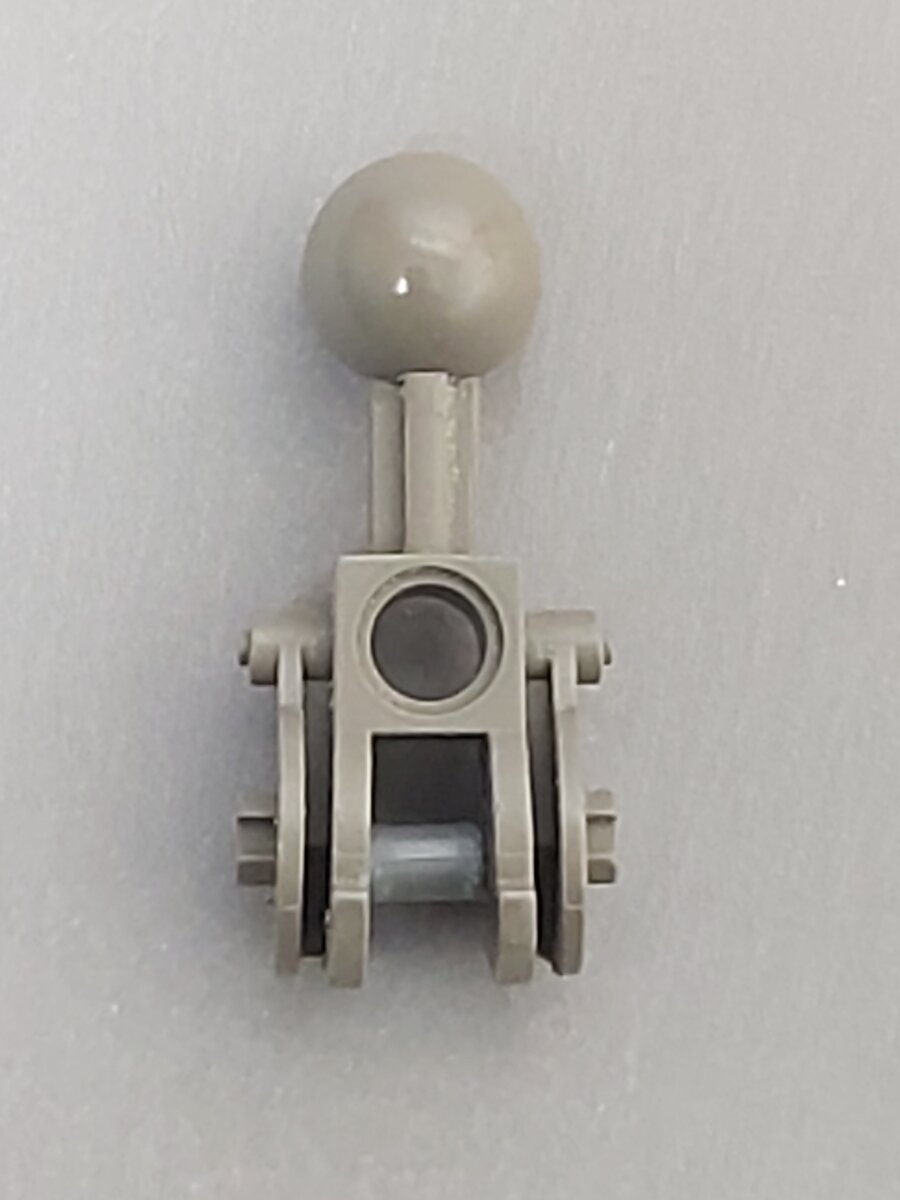
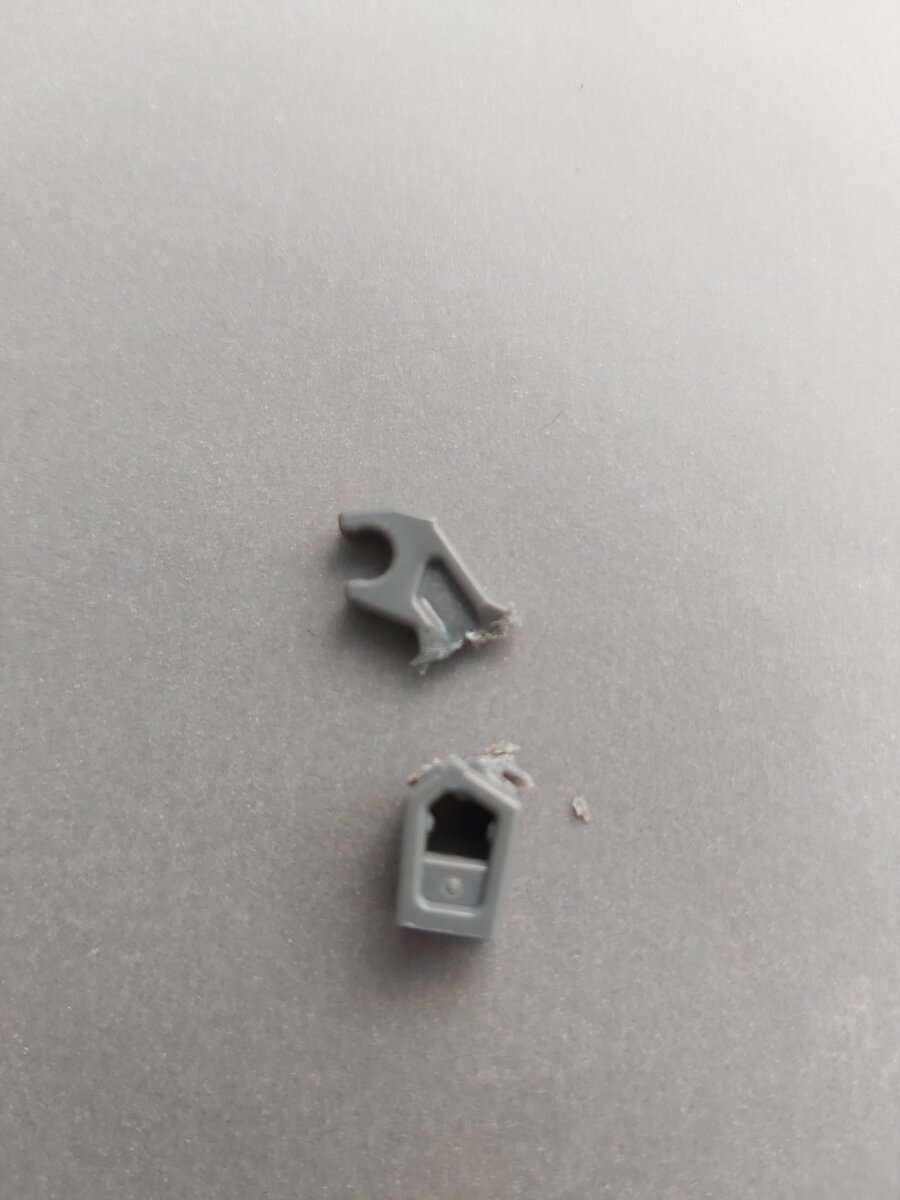
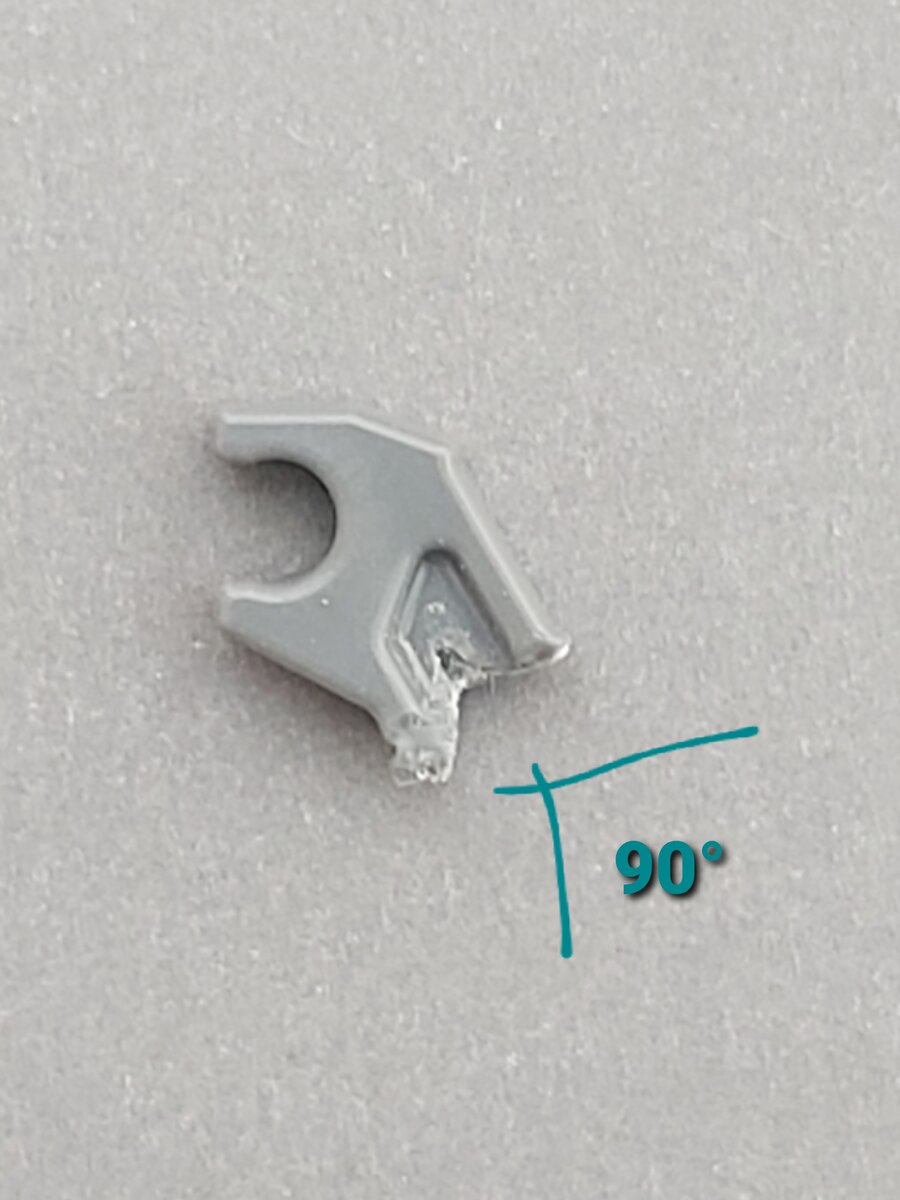
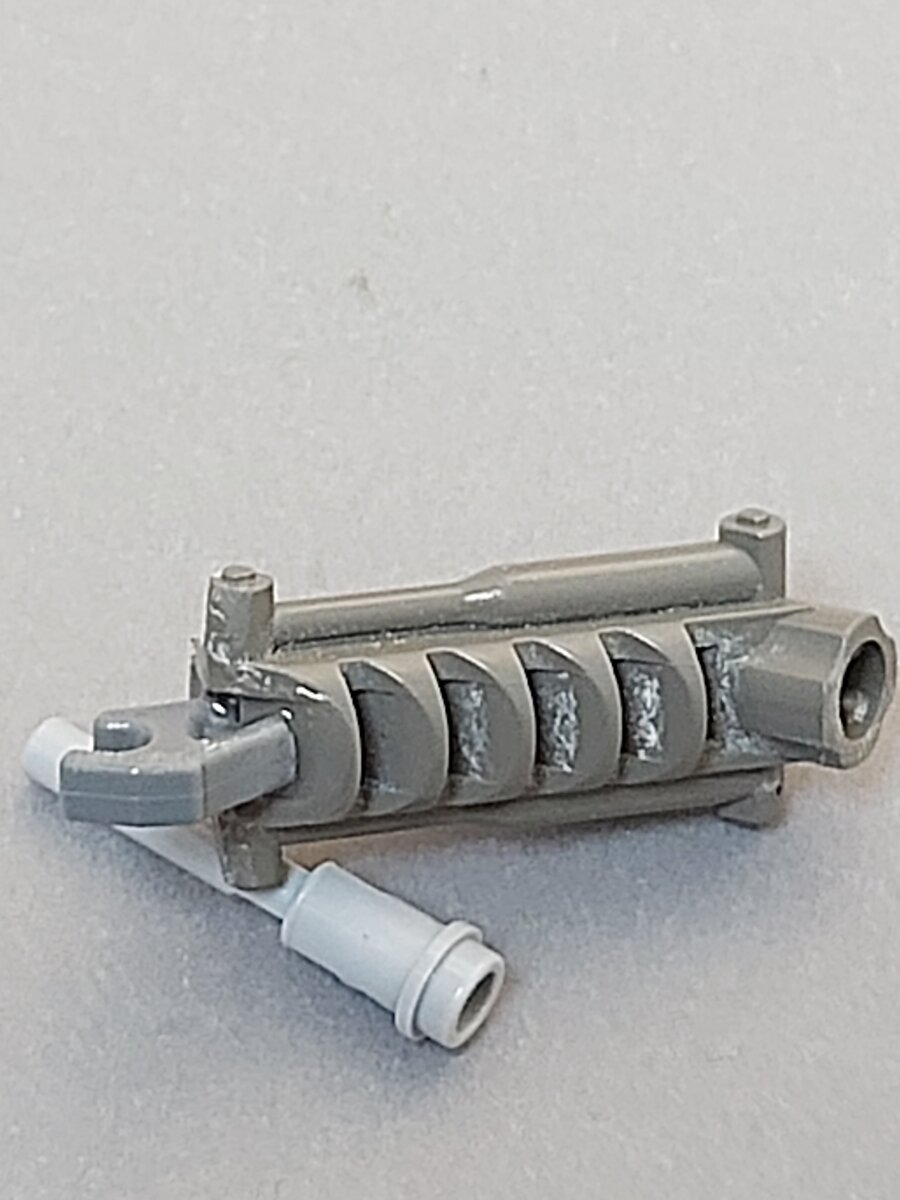
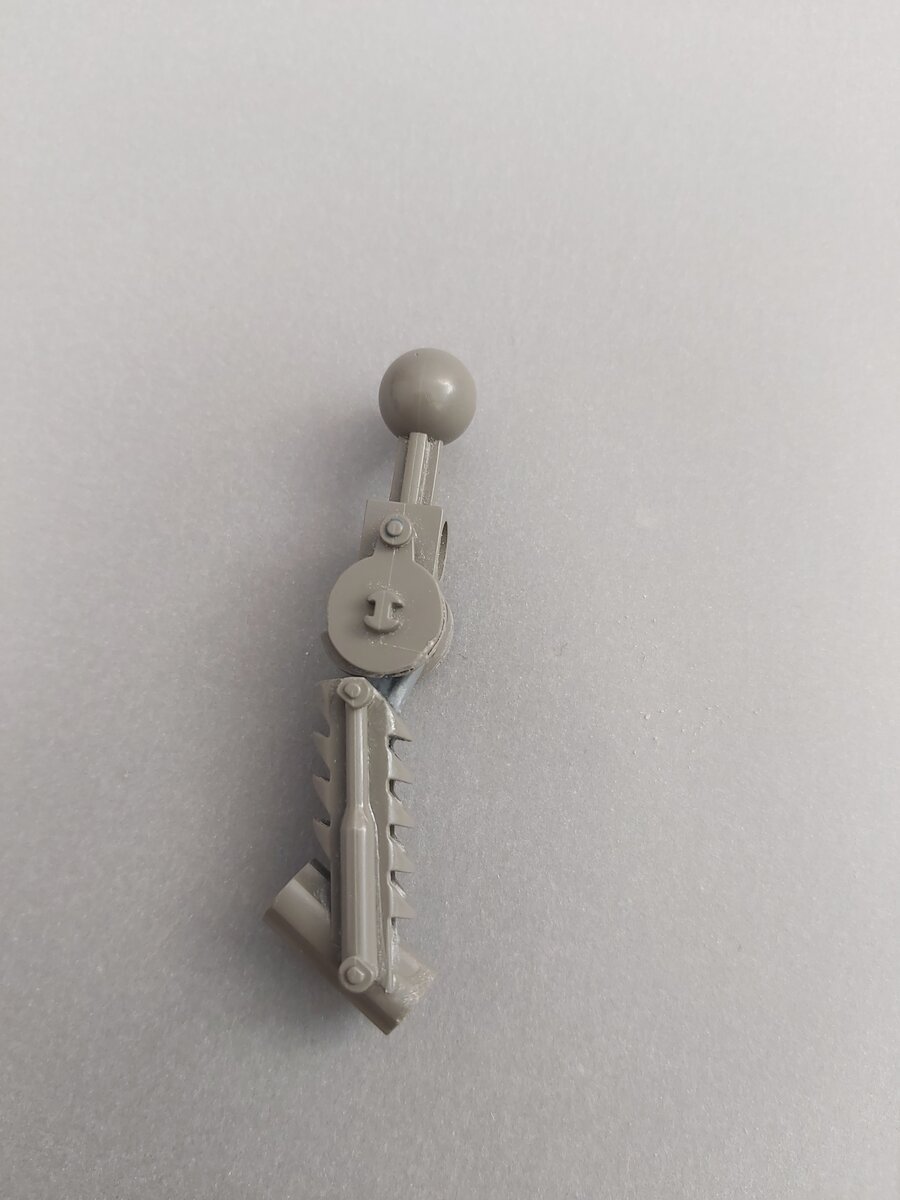
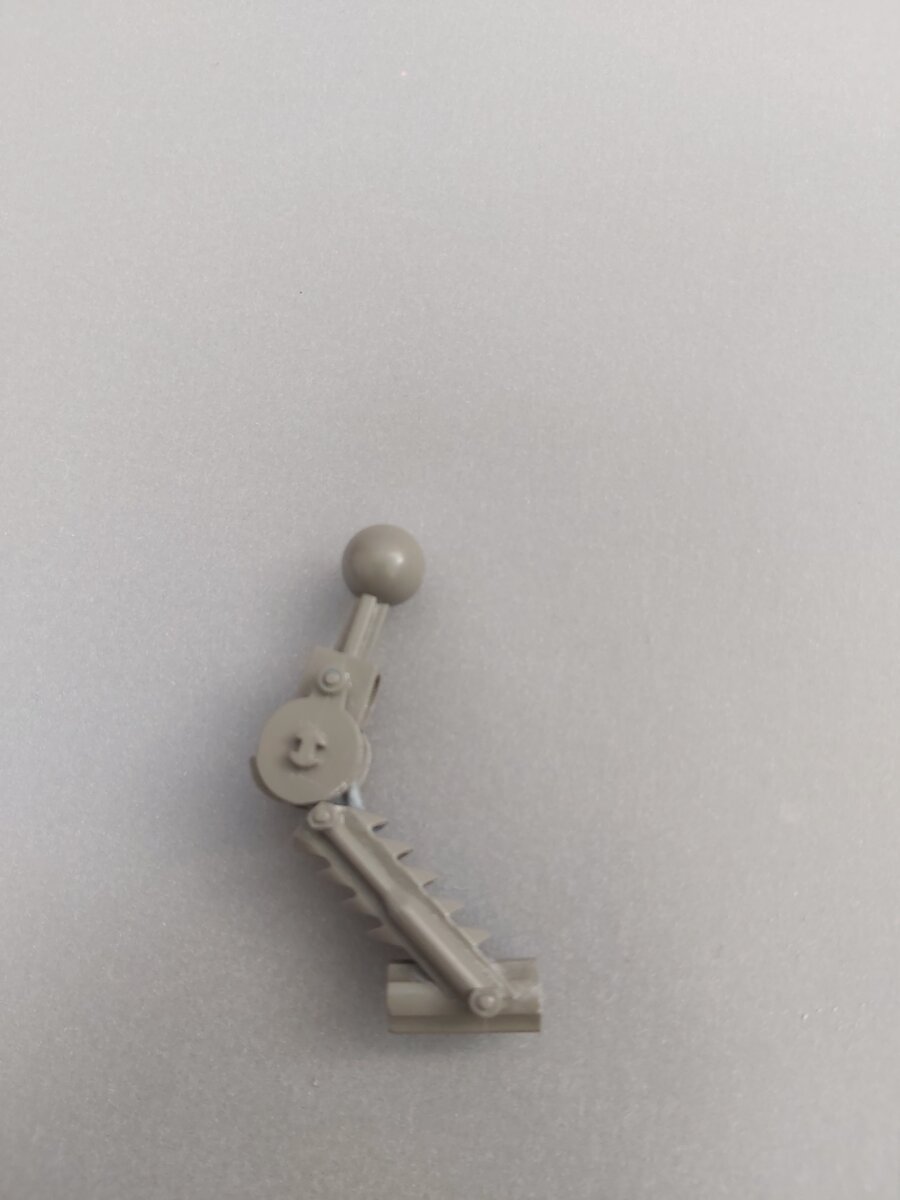
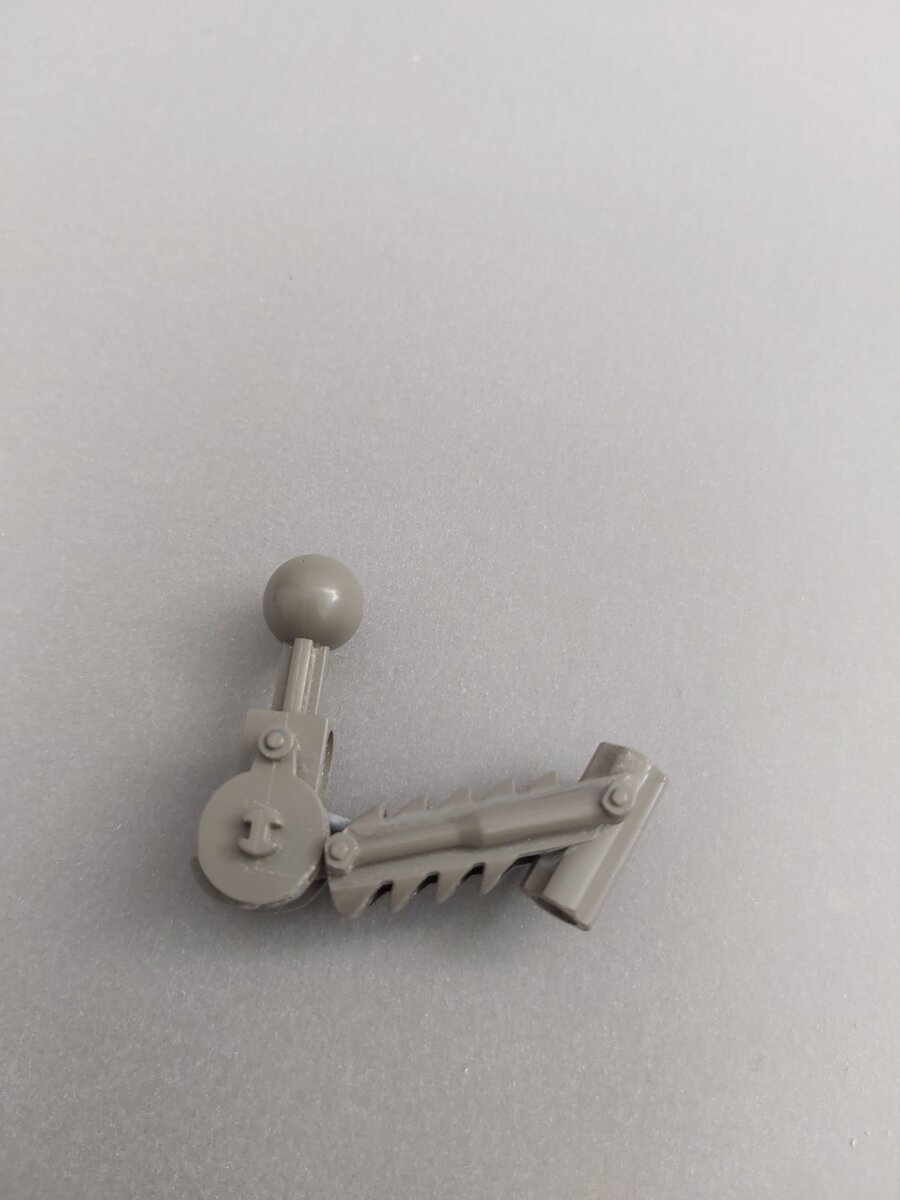
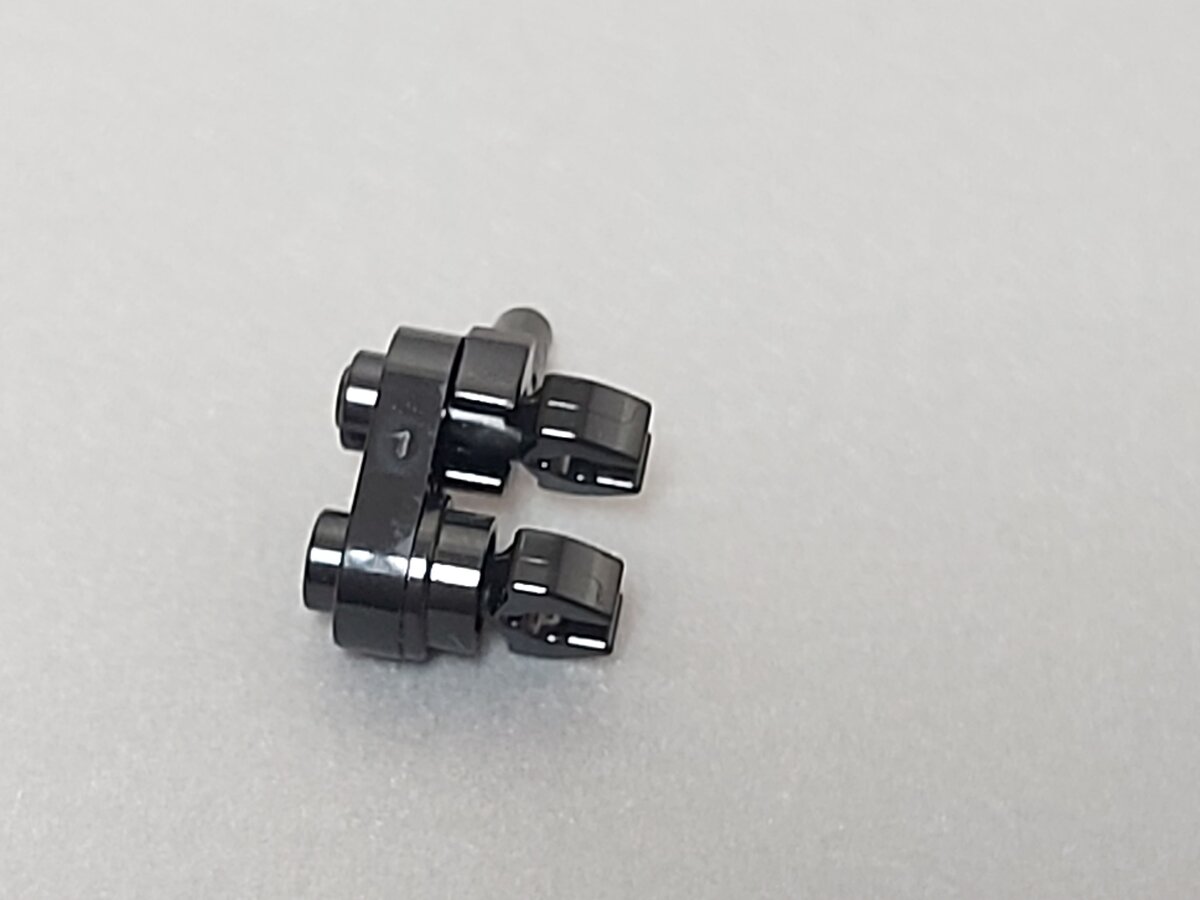
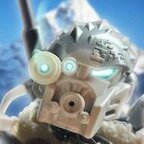
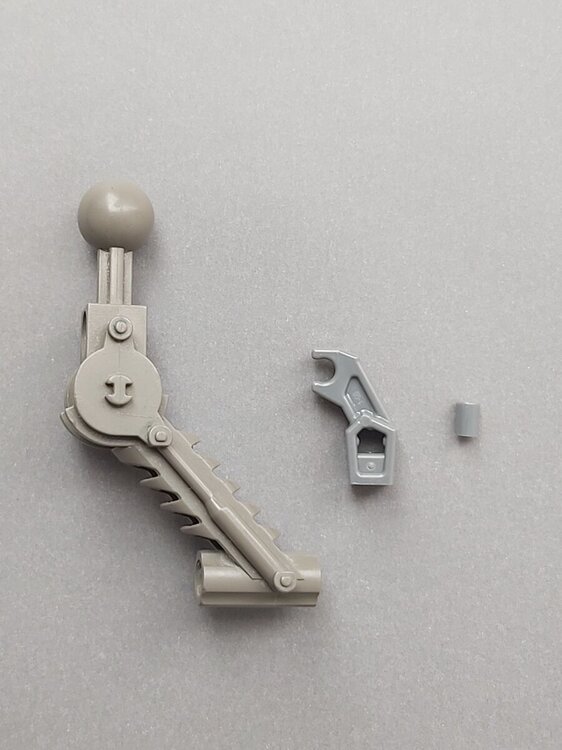
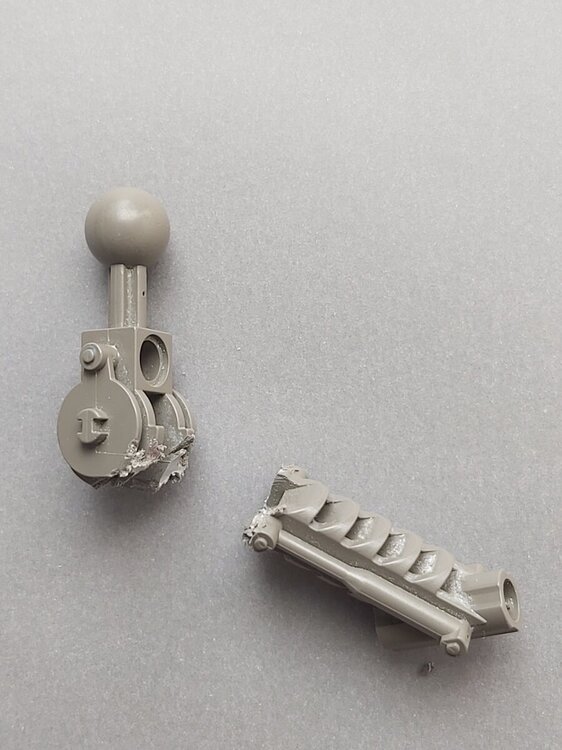
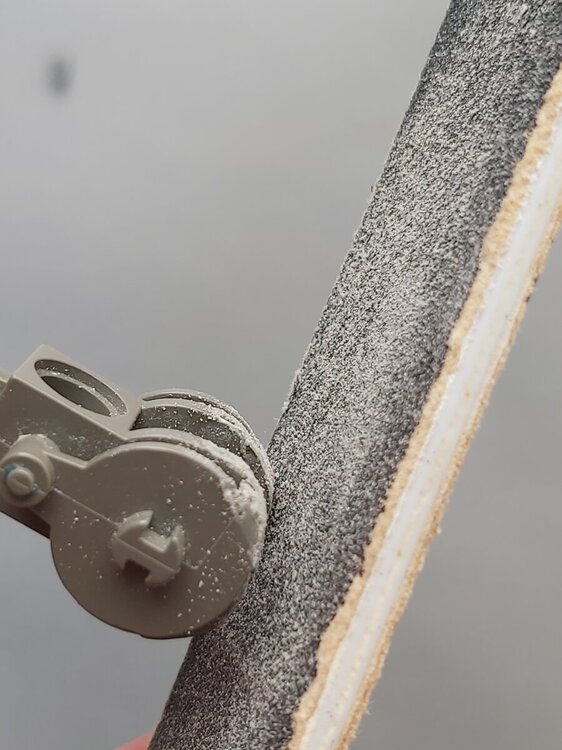
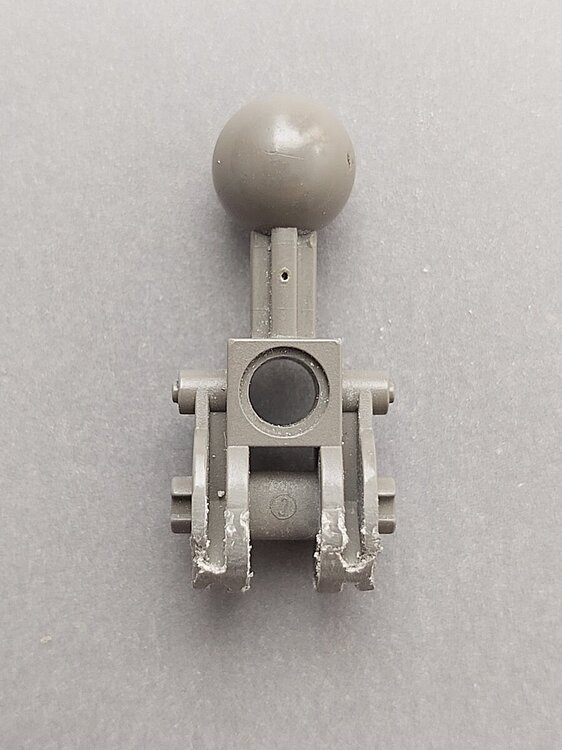
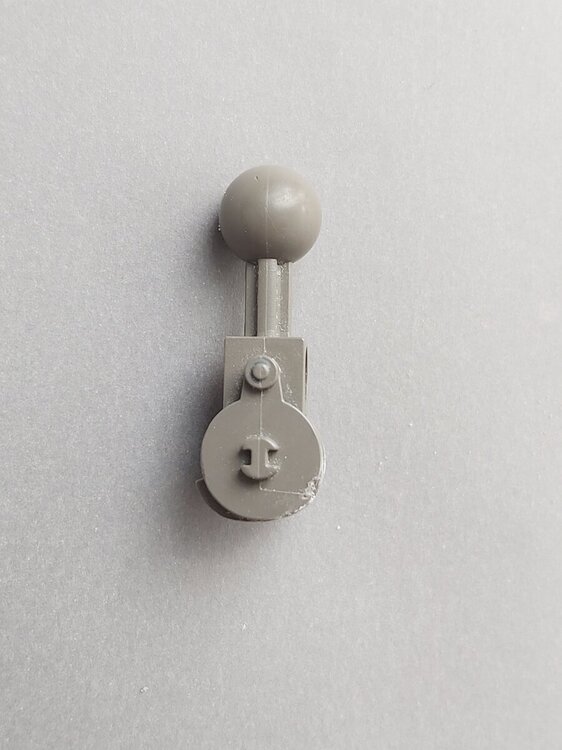
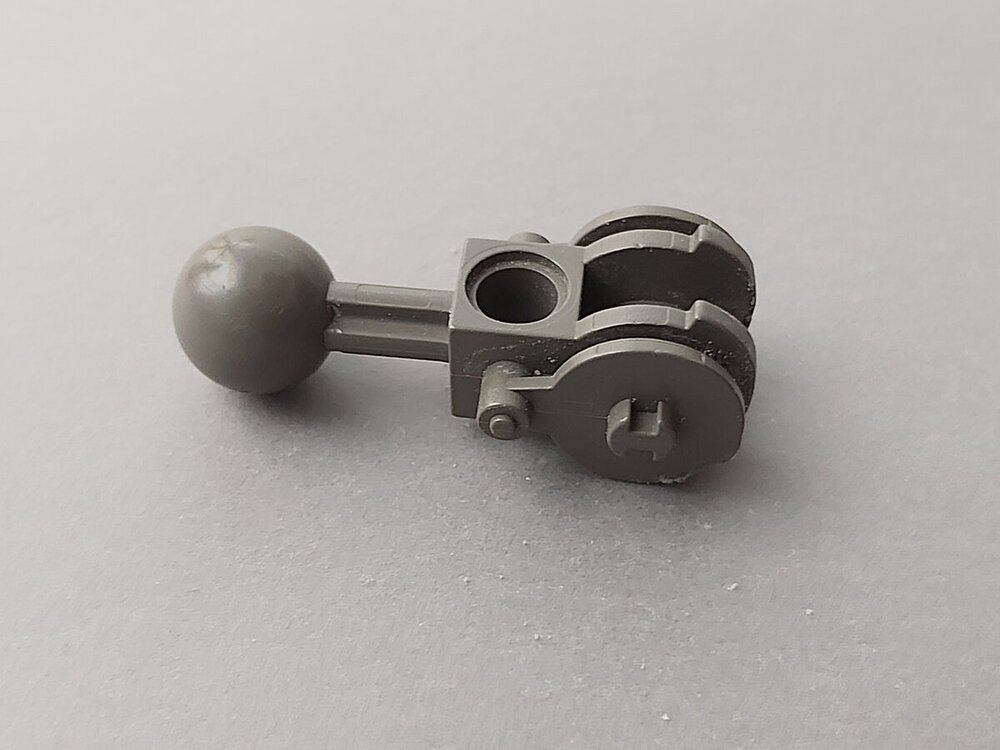
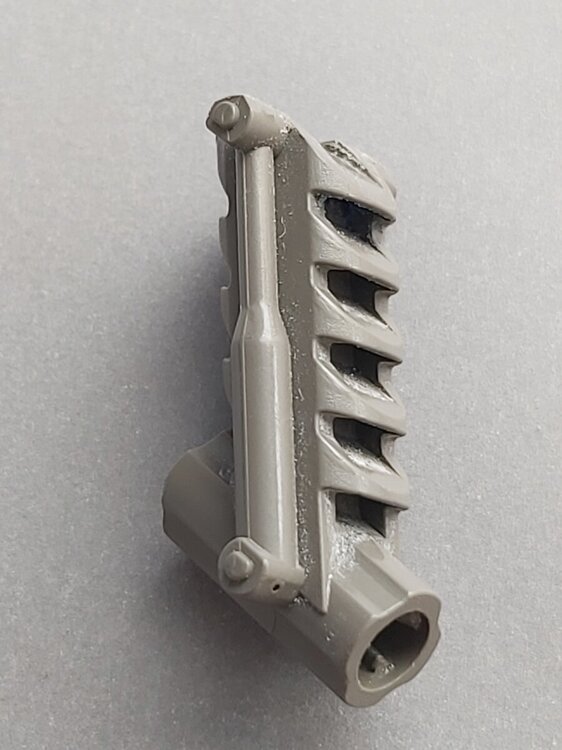
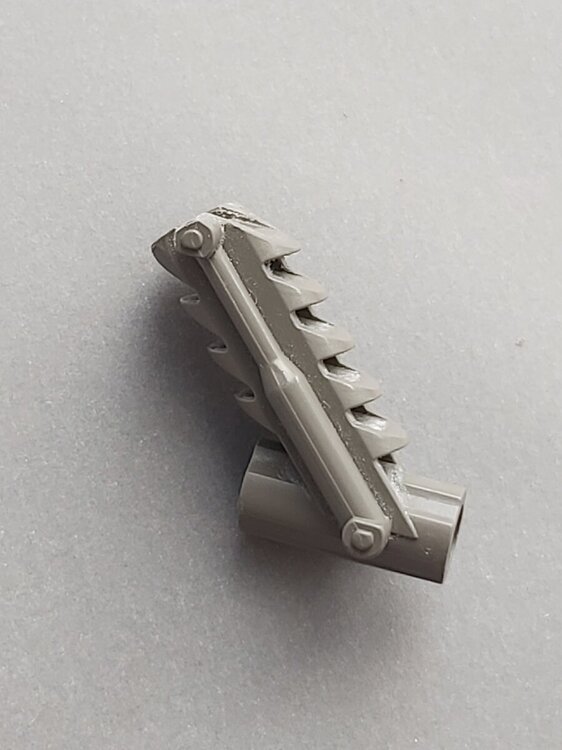
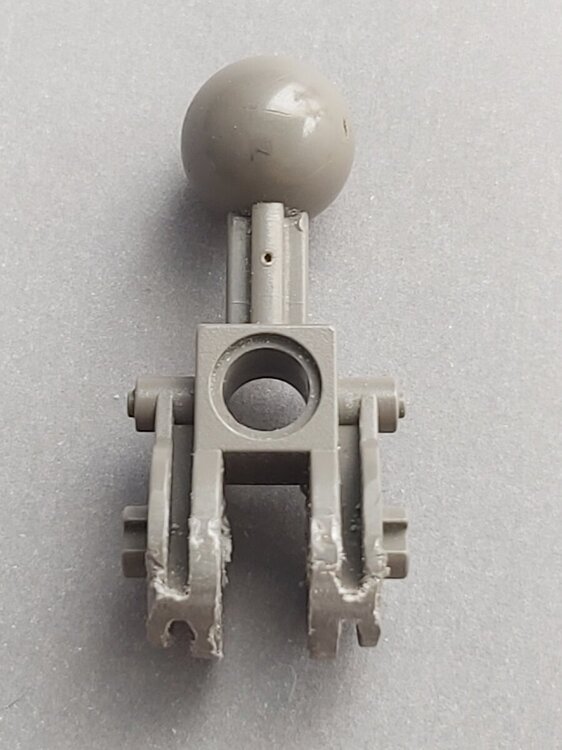
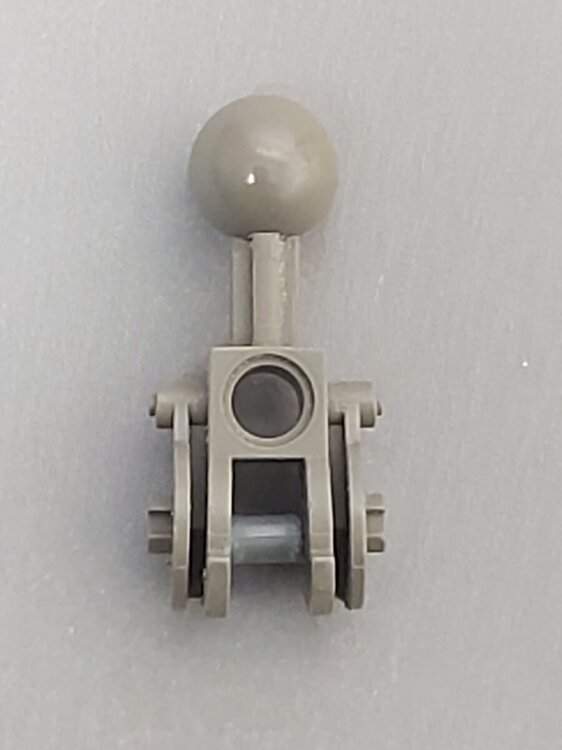
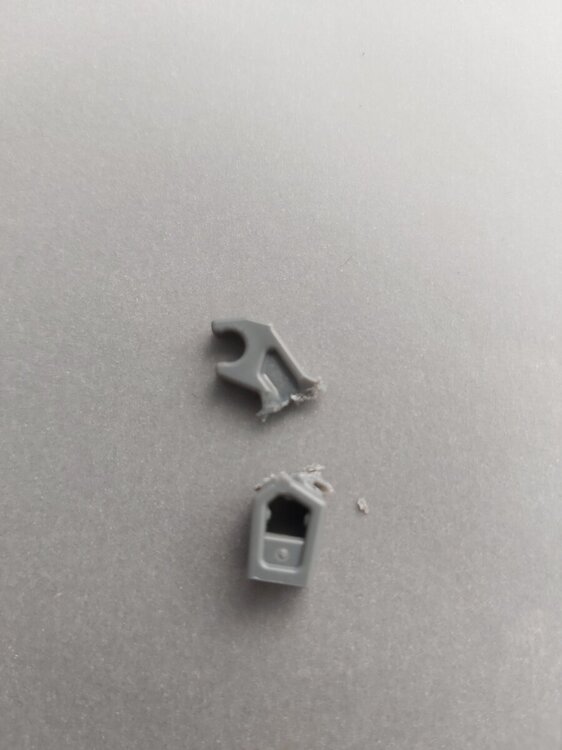
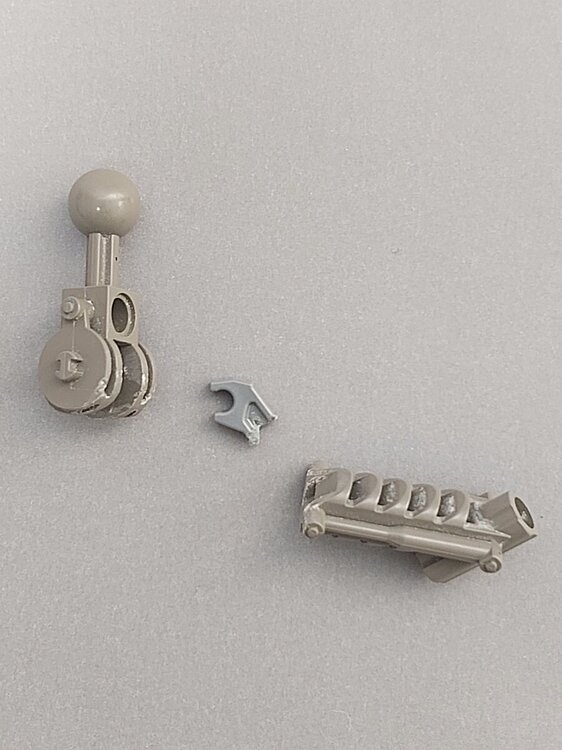
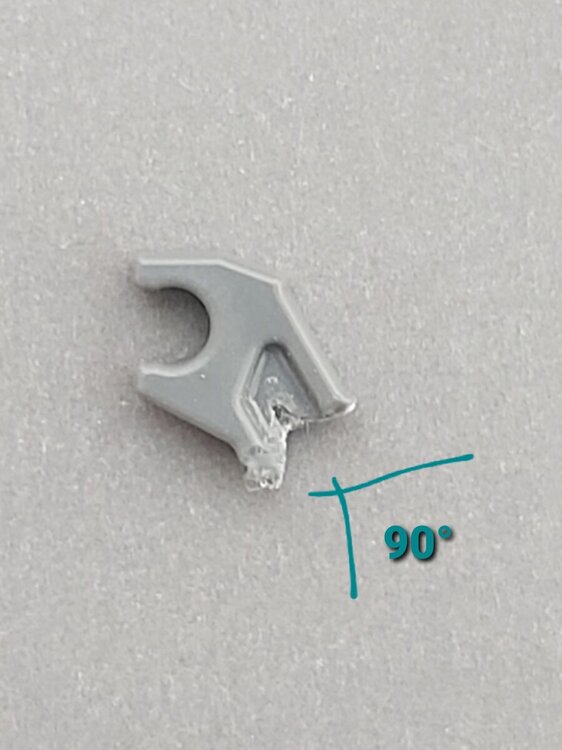
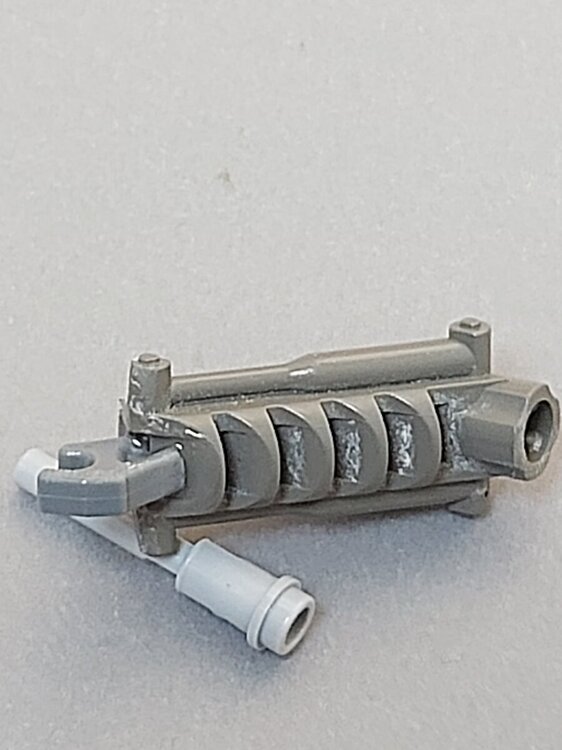
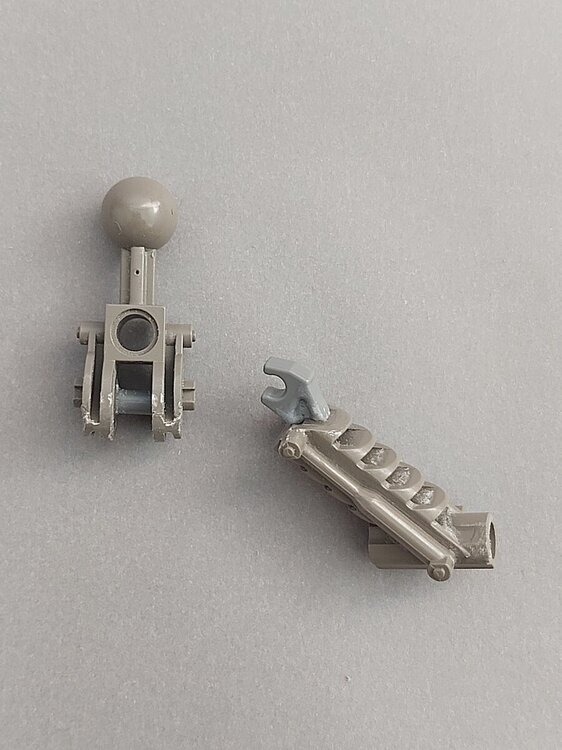
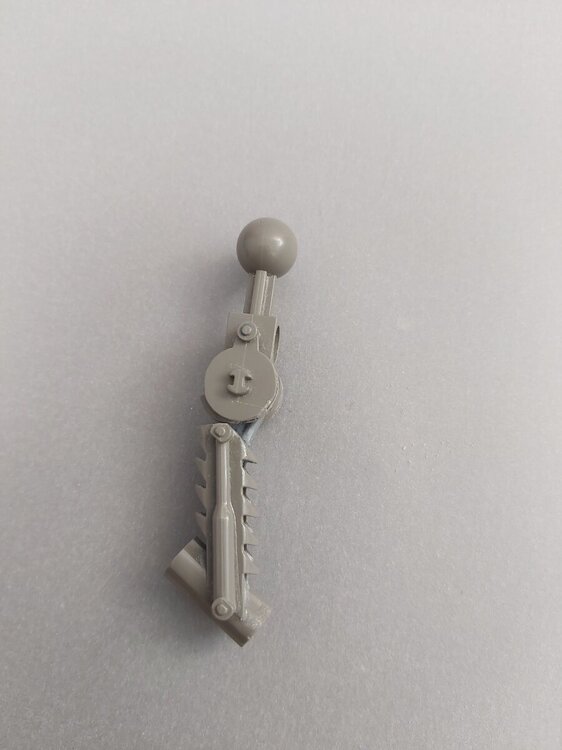
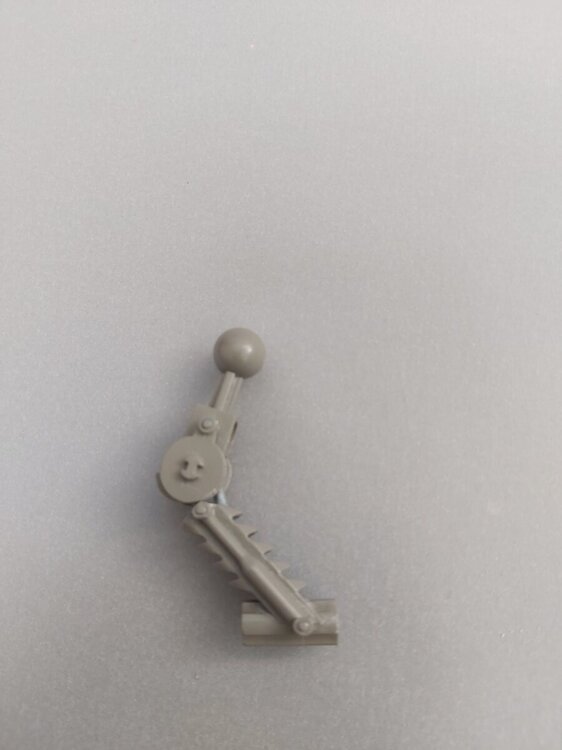
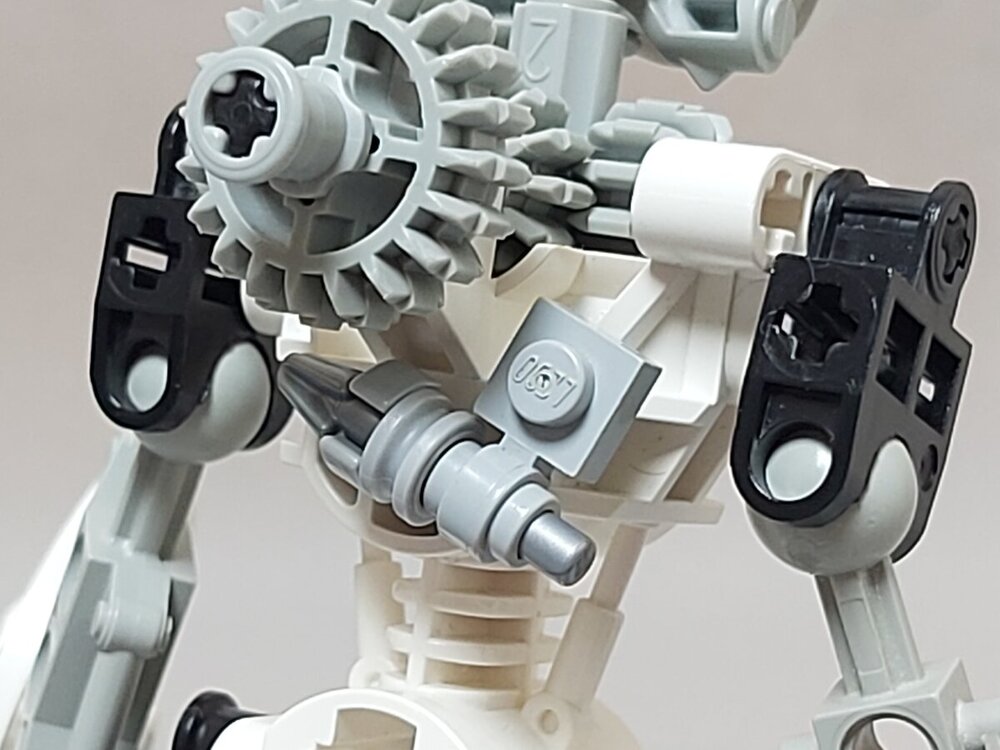
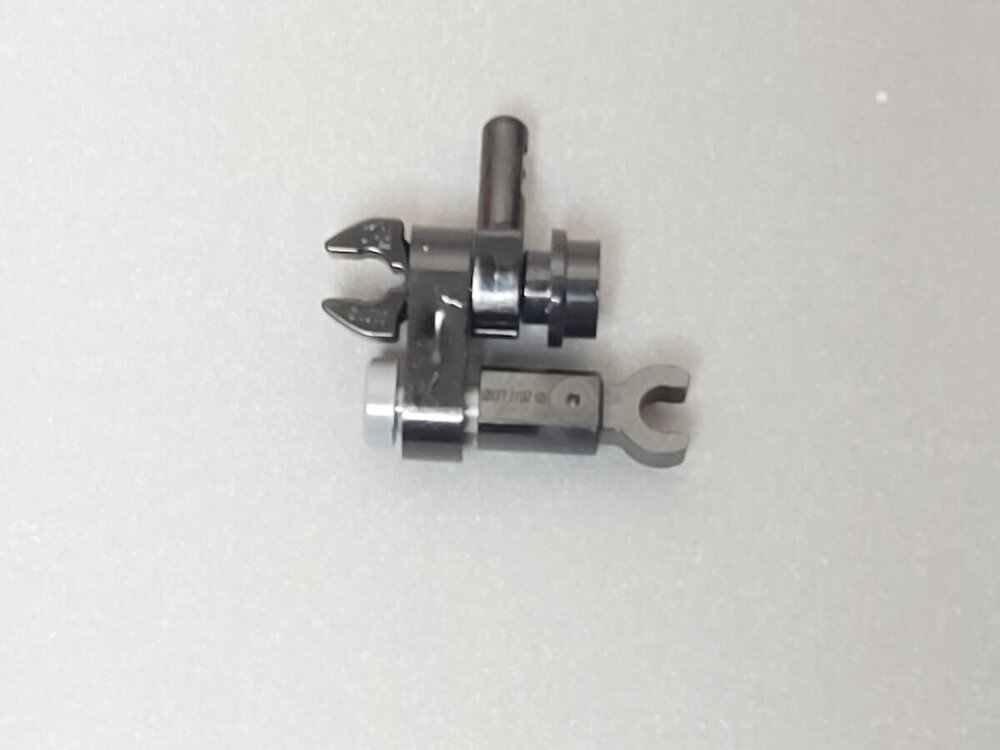
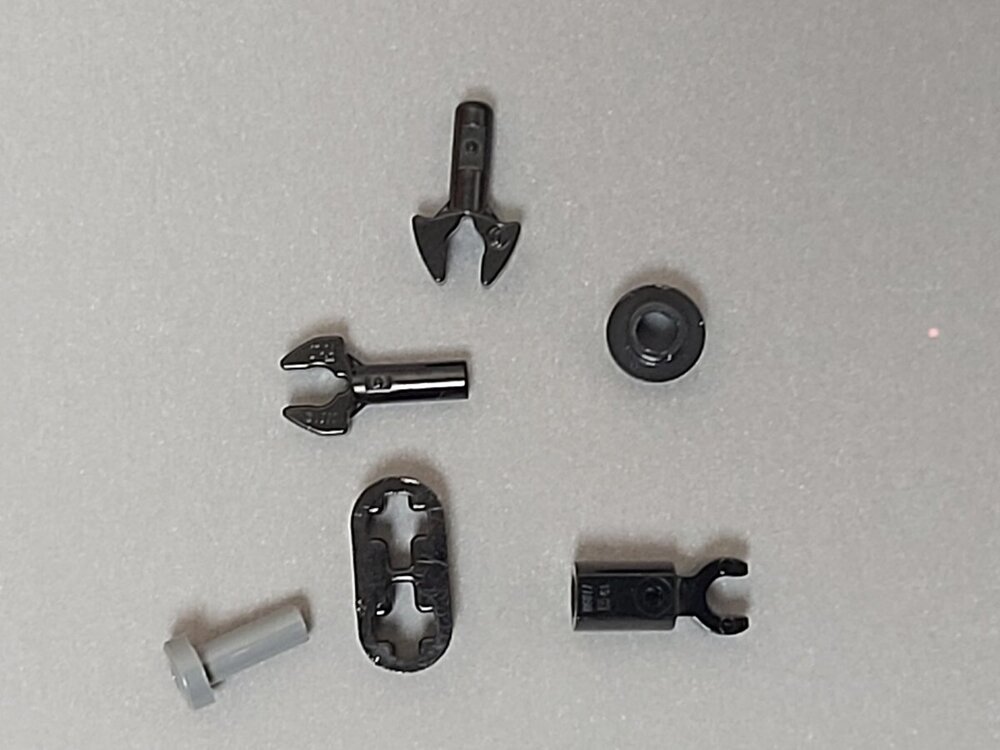
Hi, Since a lot of people are interested, I'm going to show you my process to create articulation in this classic lego piece. DISCLAIMER: do this at your own risk. What you will need ... - 1x sword-arm piece (duh) - 1x exo-force robot arm - 1x flextube (or cut rode) 1/4 of a black pin length - a pair of model kit nippers - instant glue - sanding tool The process Cut the forearm from the round part layers by layers. Take your time as it is not easy. Clean the excess and sand it away. Note that the two spikes are on the back of the arm. Cut the center axle then glue the flextube in the center. Note that the 90° angle inside the forearm will be essential. You need a 90° angle. Test the length to be sure to have the maximum articulation possible. Glue the two pieces (be sure to centre the exo-force arm). And you're done! Enjoy !


- 4 replies
-
- 1
-

-
- bionicle
- g1 bionicle
- (and 1 more)
-
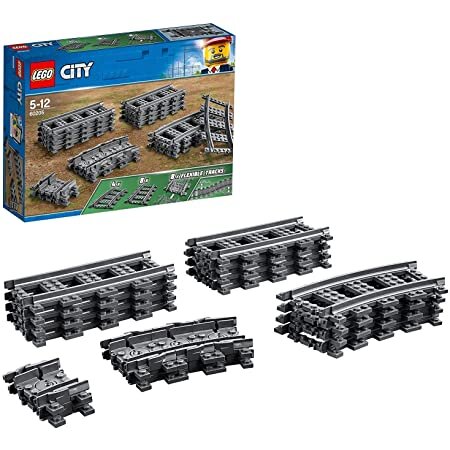
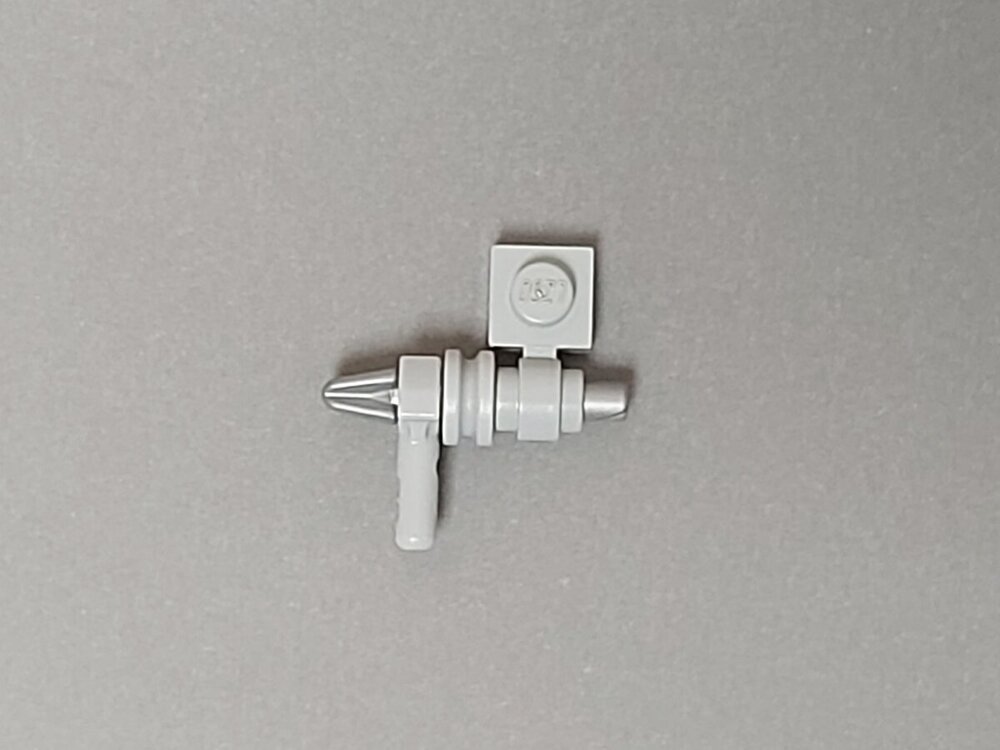
No worries. So when you buy tracks for lego trains they stack them and secure them with a long specificly shaped rode (Light saber sized but something like 12 lengh). I´ve cut that piece to pin length. i don´t know if you can find that loose but you can replicate this custom piece by using flex-tube and a bushing or cut another piece to have a similar use. I wish lego would produce such a piece, it's really useful ! EDIT: found it !!! https://www.bricklink.com/v2/catalog/catalogitem.page?P=bb0219#T=C&C=85
-
From the fan game : BIONICLE: masks of power it´s very recent : )
-
Yes i did and i will post a tutorial soon. : ) One of my goal was to make them as invisible as possible, so as to keep them close to the CGI magic ^^ thanks for your kind coment !
-
No problem ! : D I love how you can read the intentions of an artist in its creations. It´s pretty much the same for MOCs . ^^
-
Wow ! Really well done ^^. I like the silhouette of that noble beast, it looks very natural. Did you use references ? As for the exposed Ball joint i don´t think it´s that bad. It doesn´t detract from the shapping in my opinion. Congrats on getting in the news by the way !
-
Thanks a lot ! If my stuff inspire others to build It´s even better : )
-
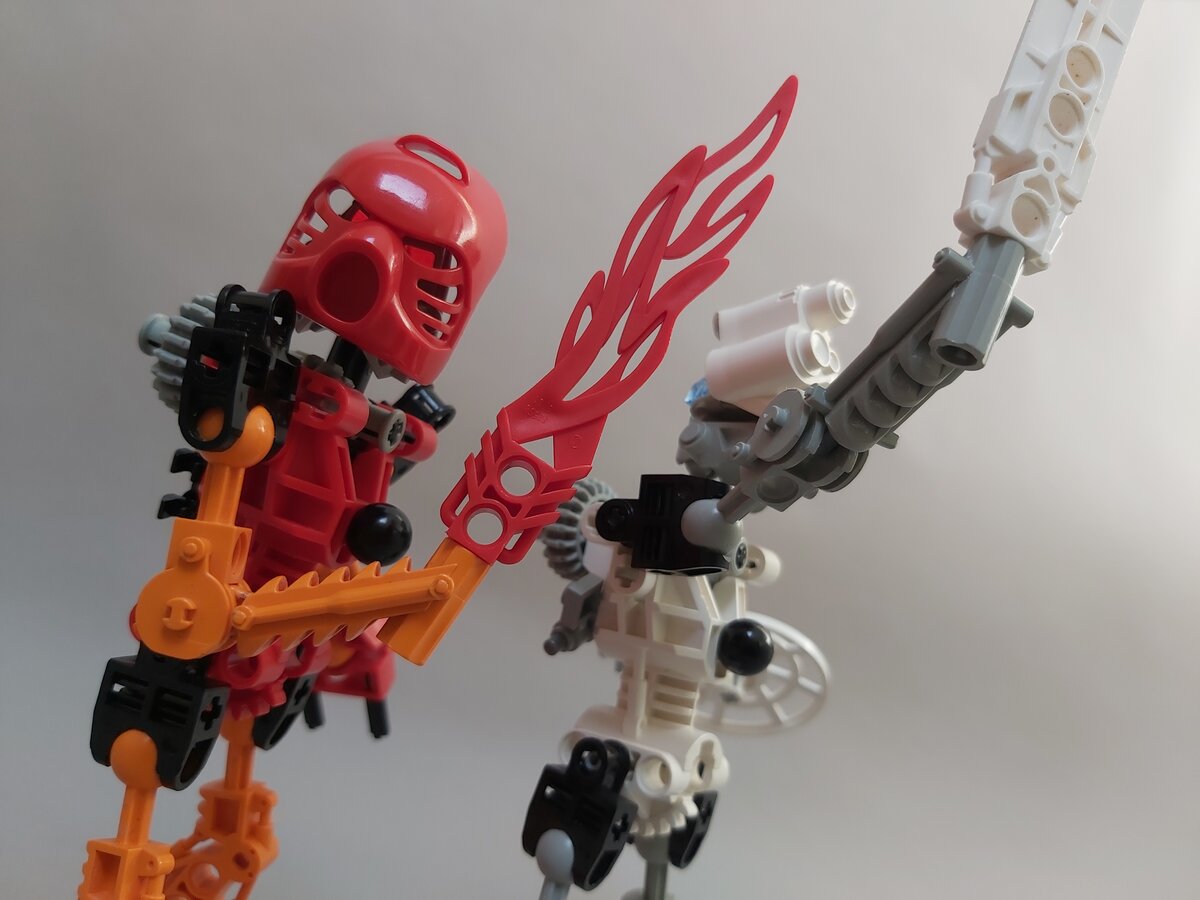
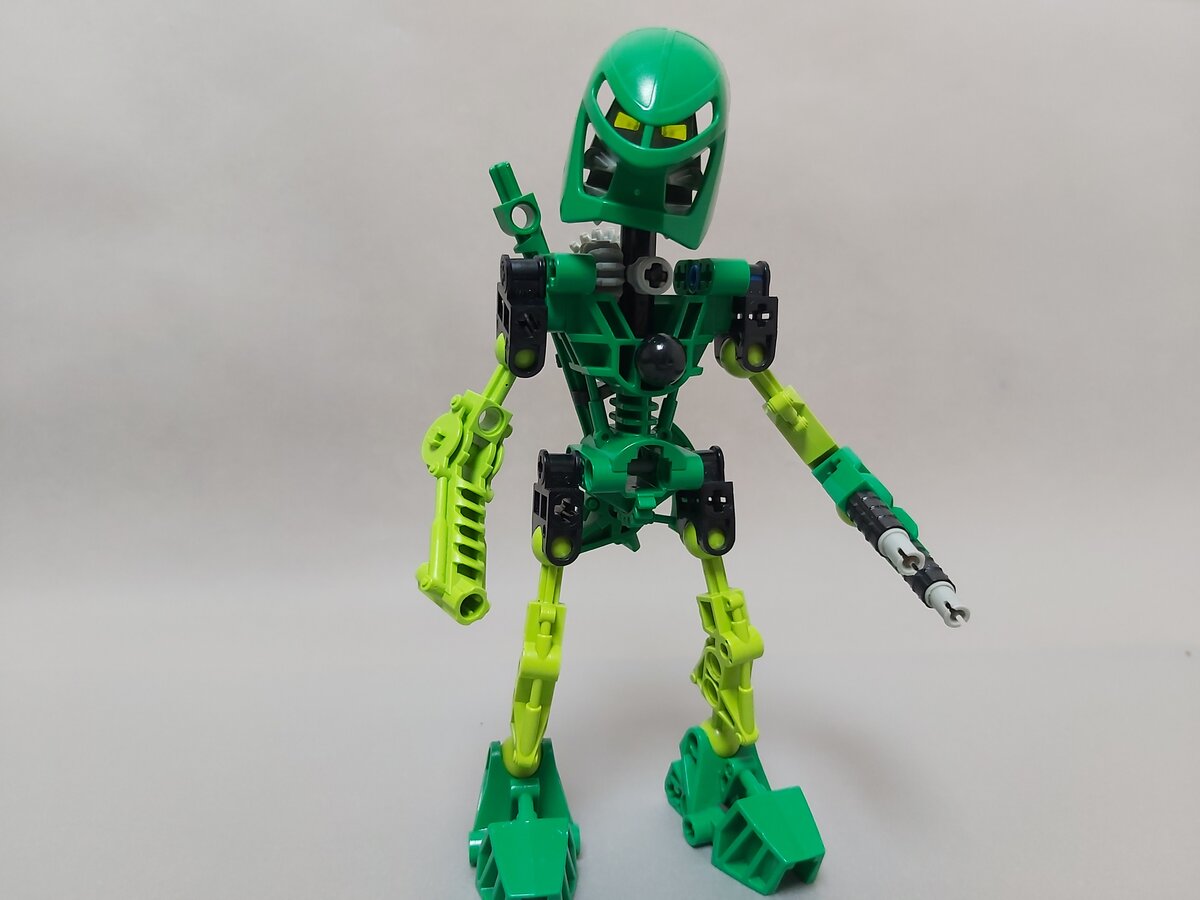
Thanks ^^ ! As for the arms, it´s custom work. I have cut the arm at the round part and used an exoforce arm (cut to only keep the C clip) and a rod to create articulation. I might post pictures of the process : D
- 12 replies
-
- 1
-
-
- bionicle g1
- toa mata
- (and 2 more)
-
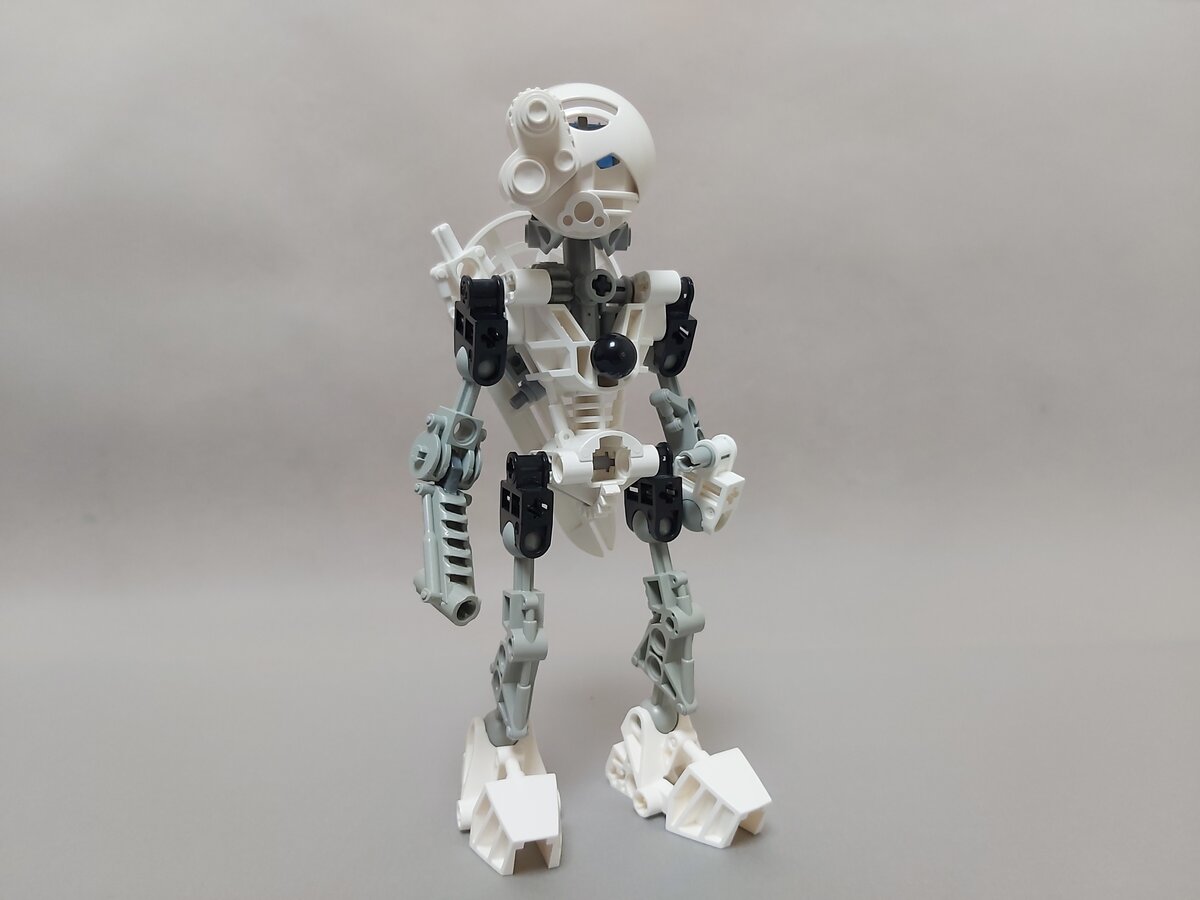
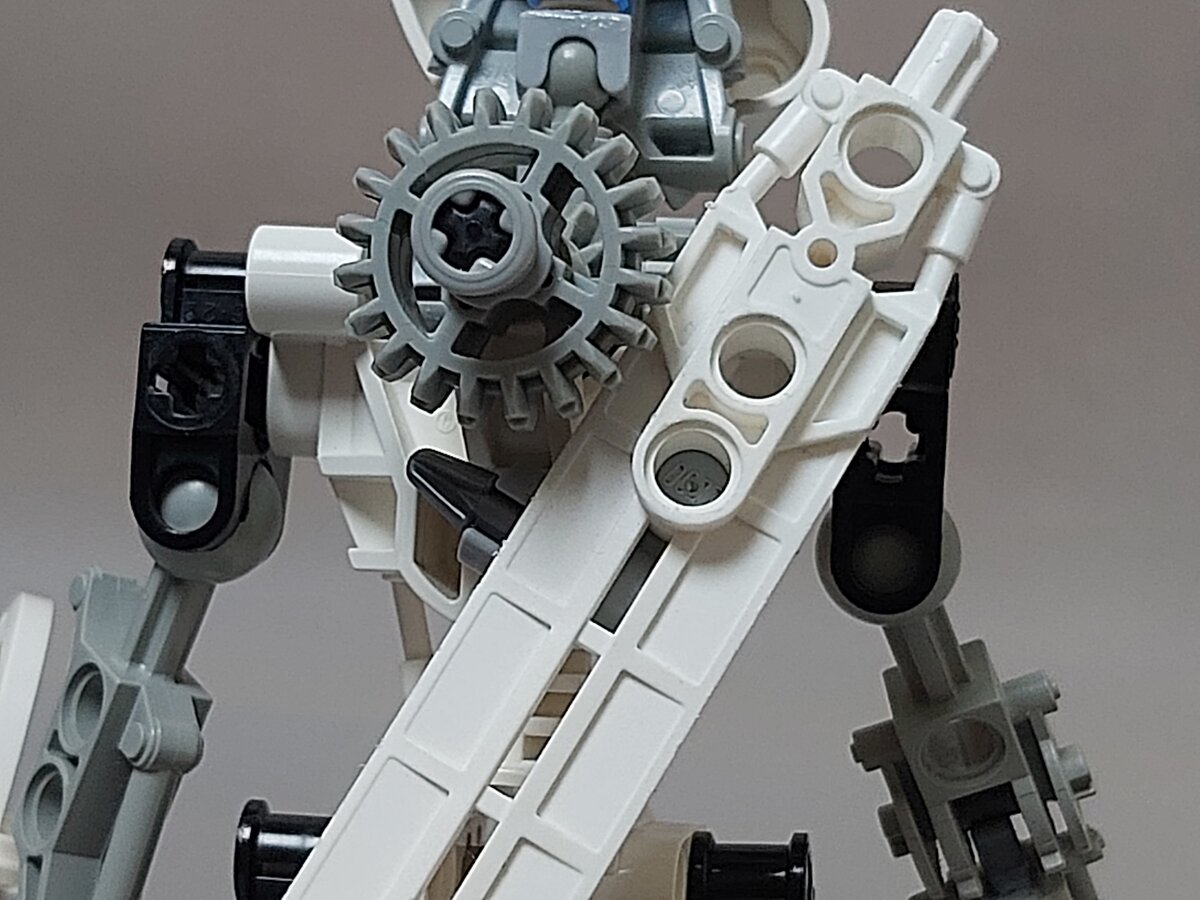
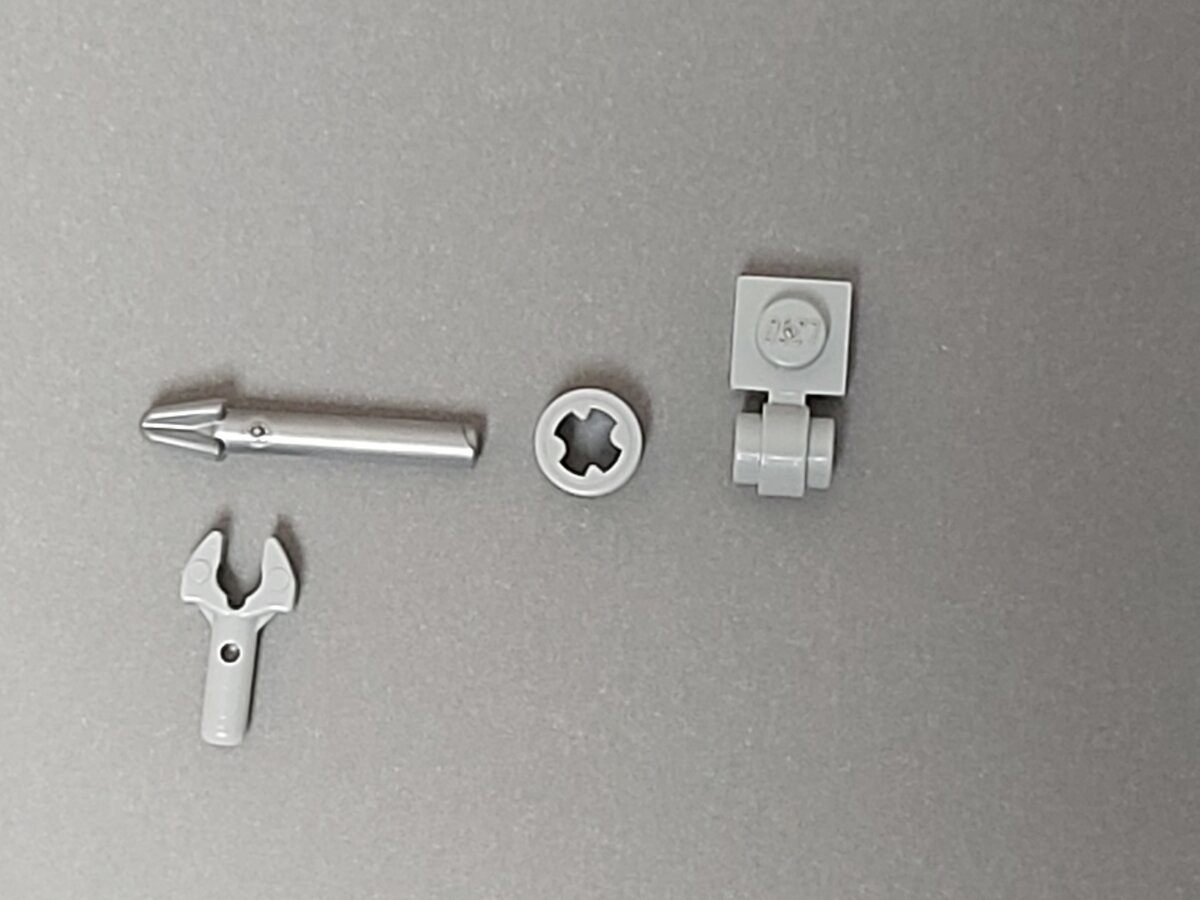
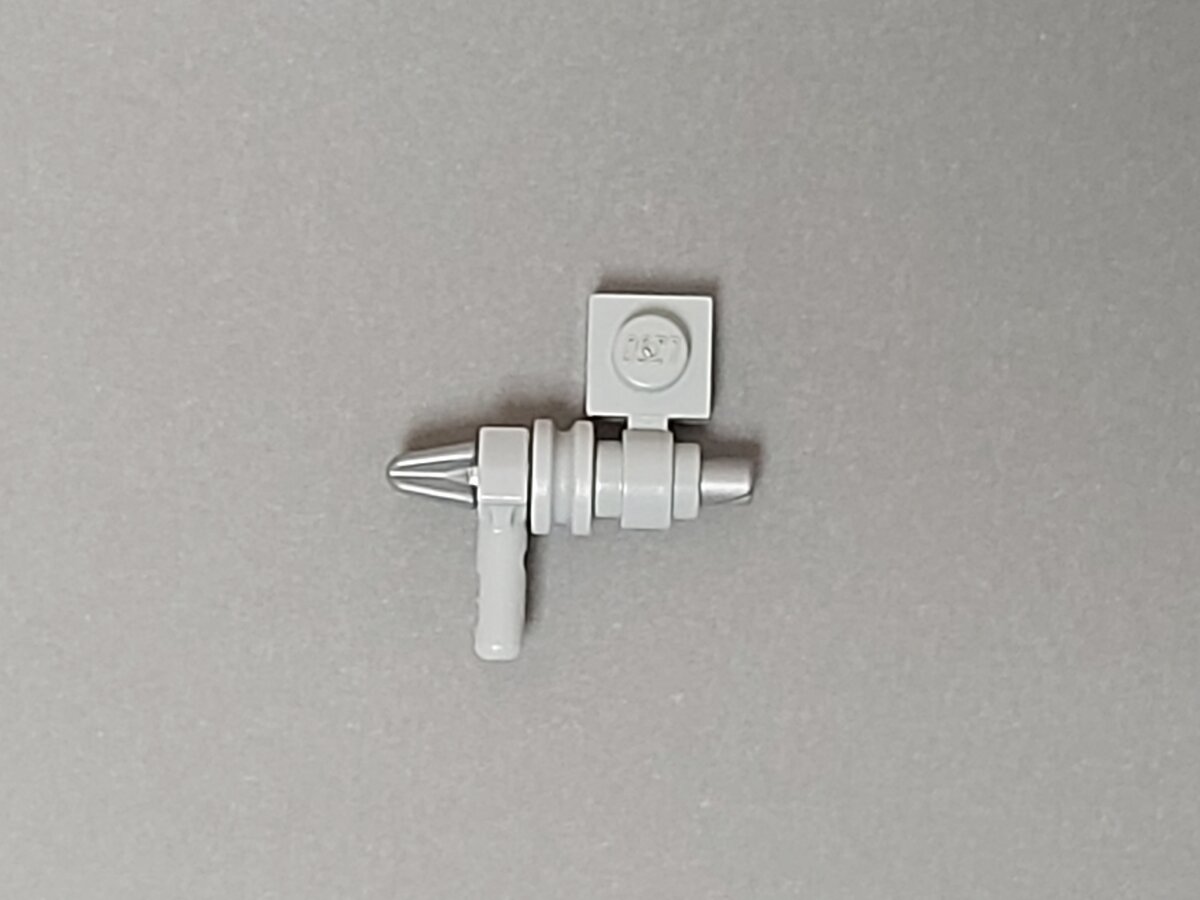
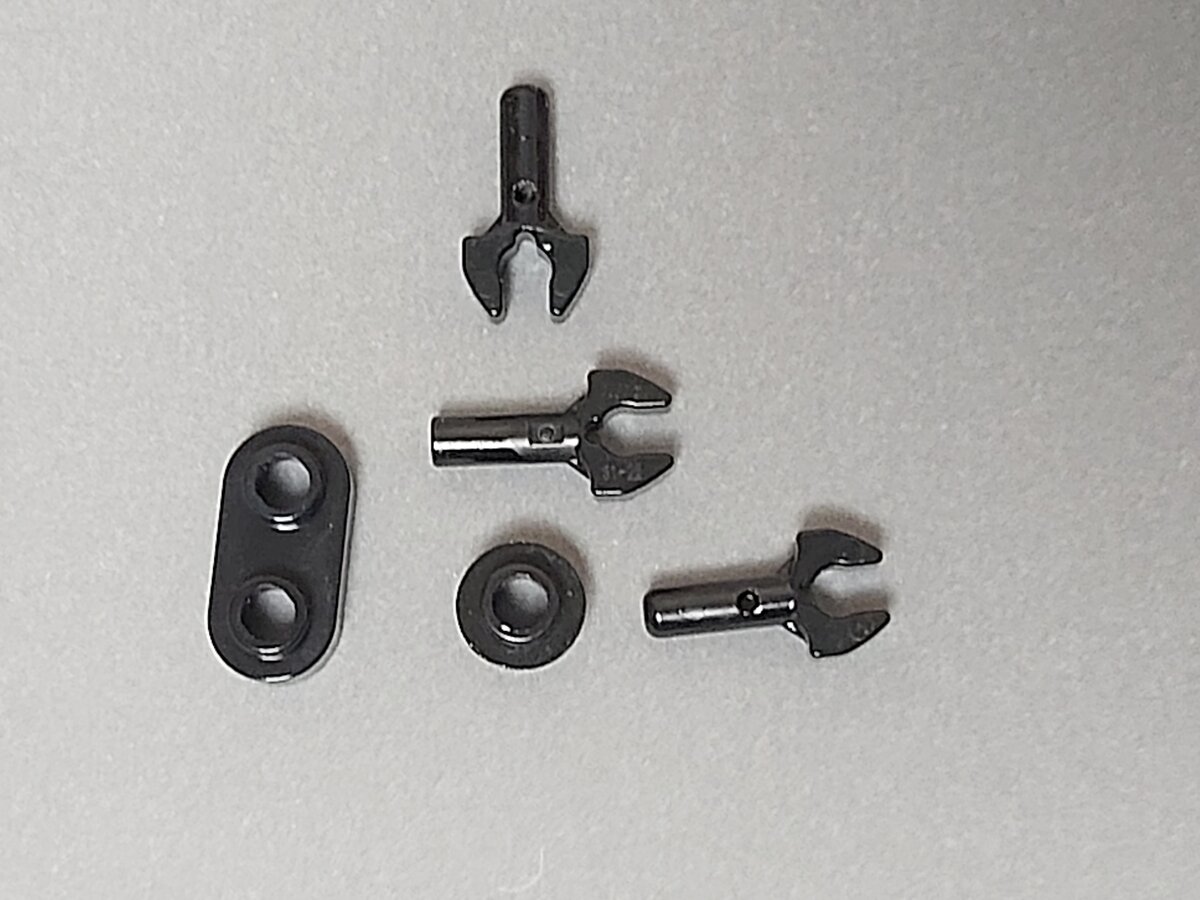
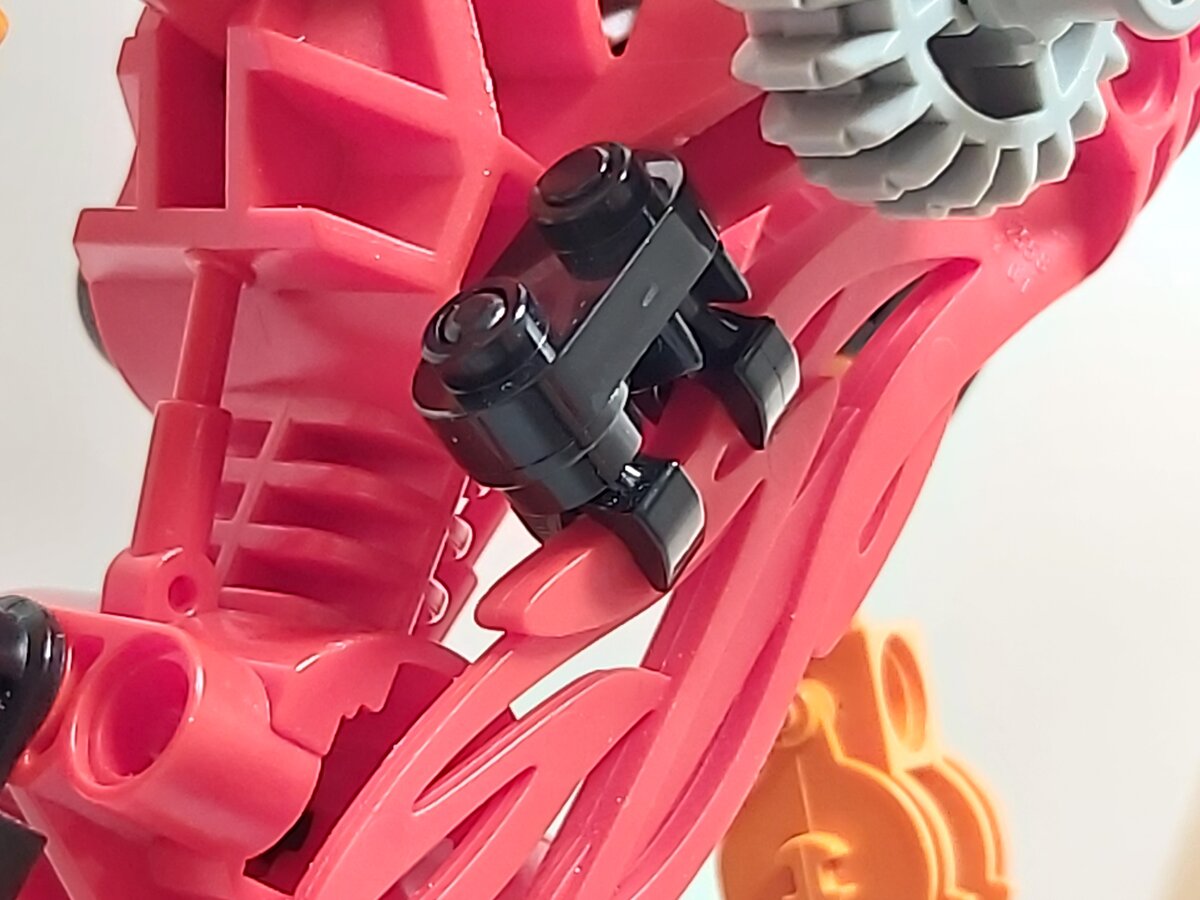
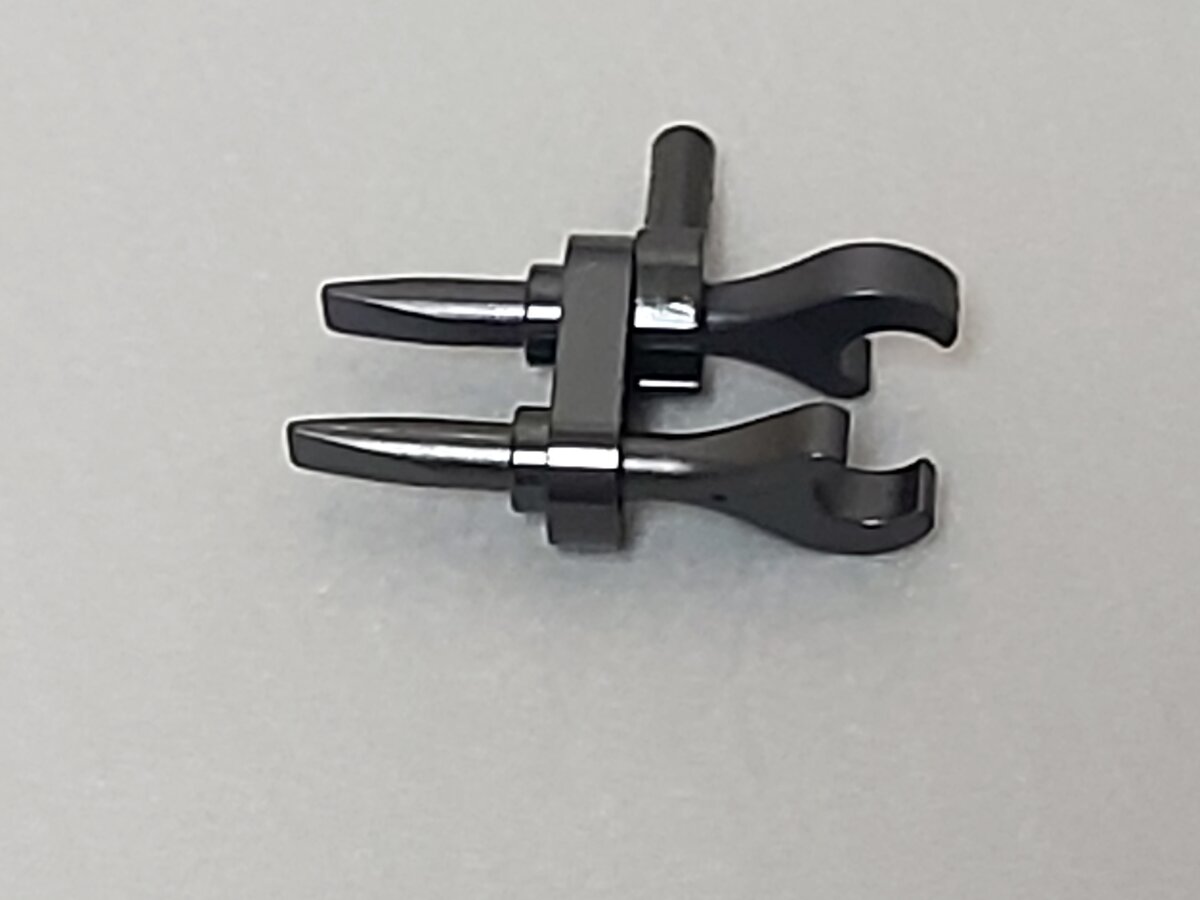
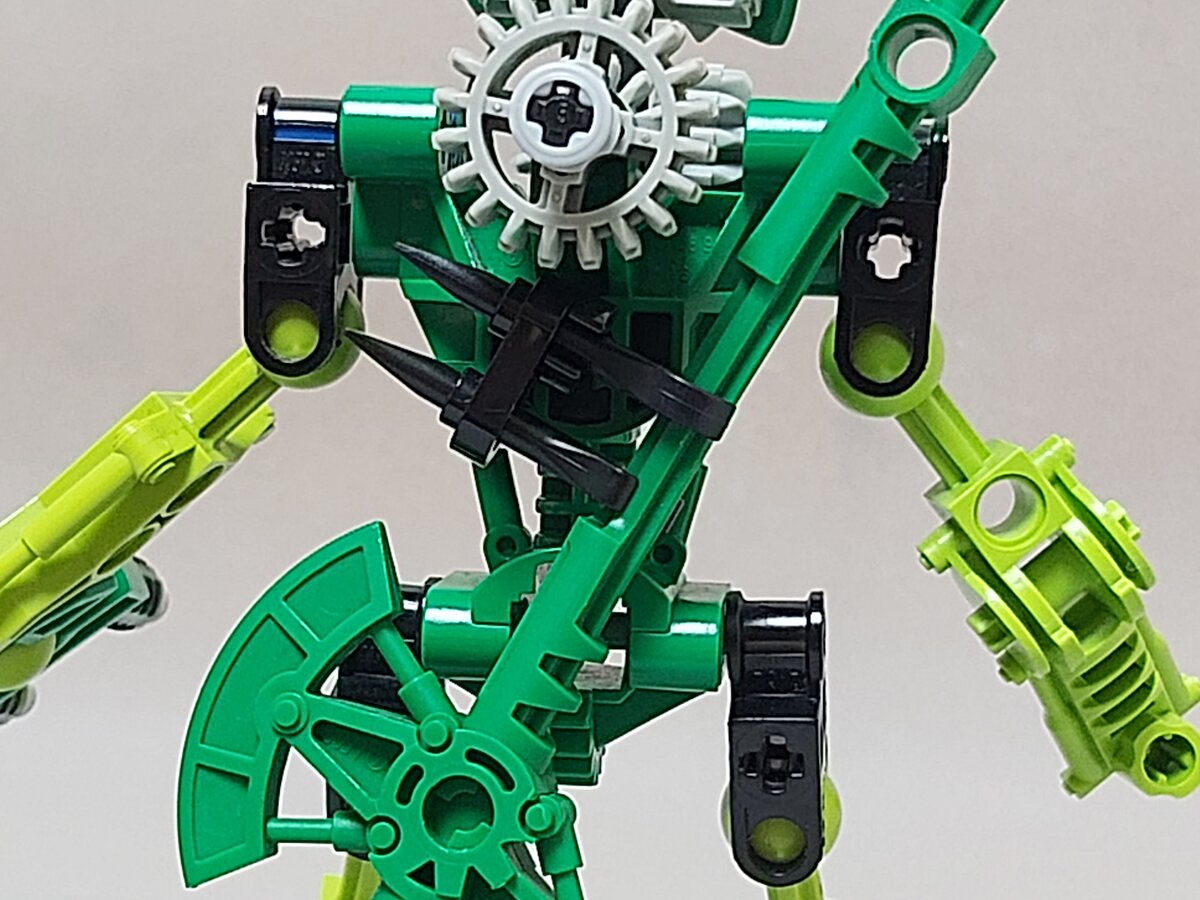
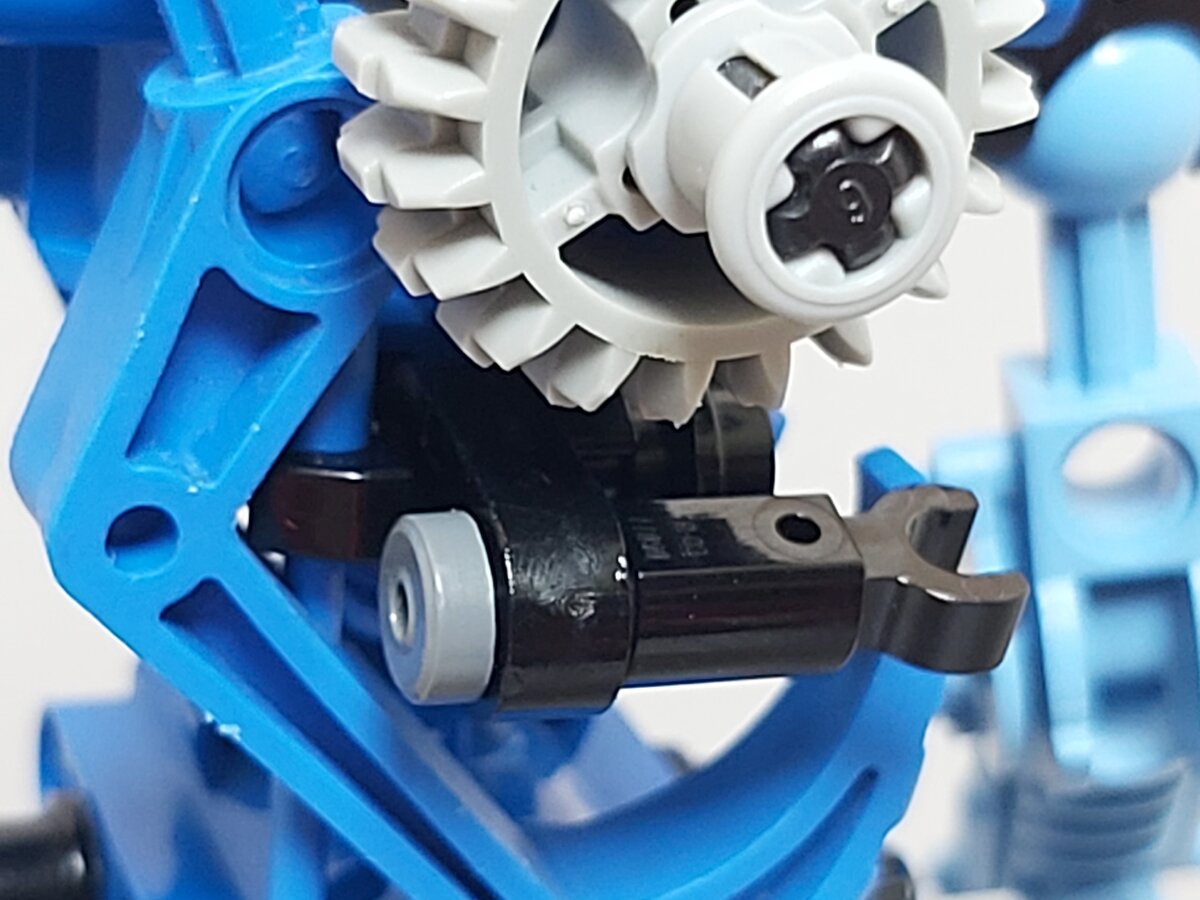
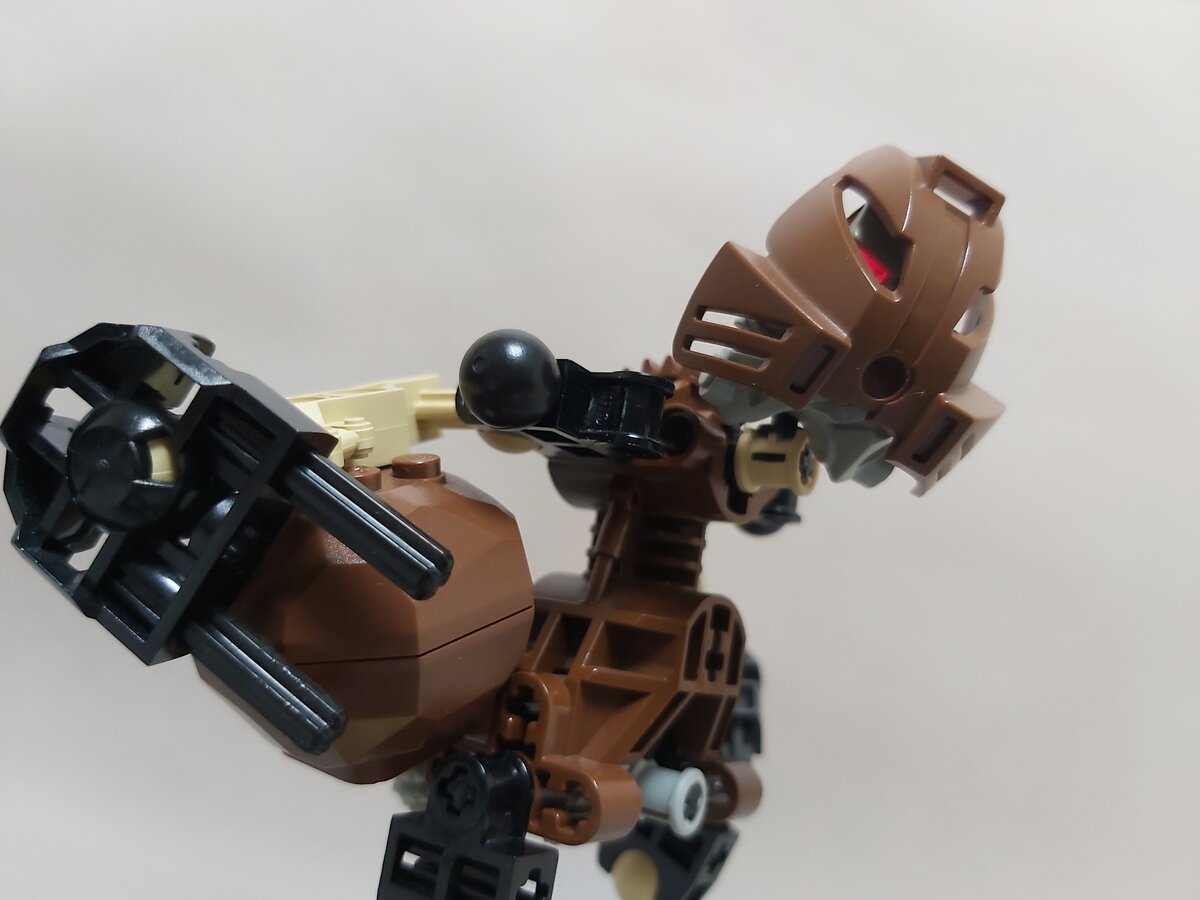
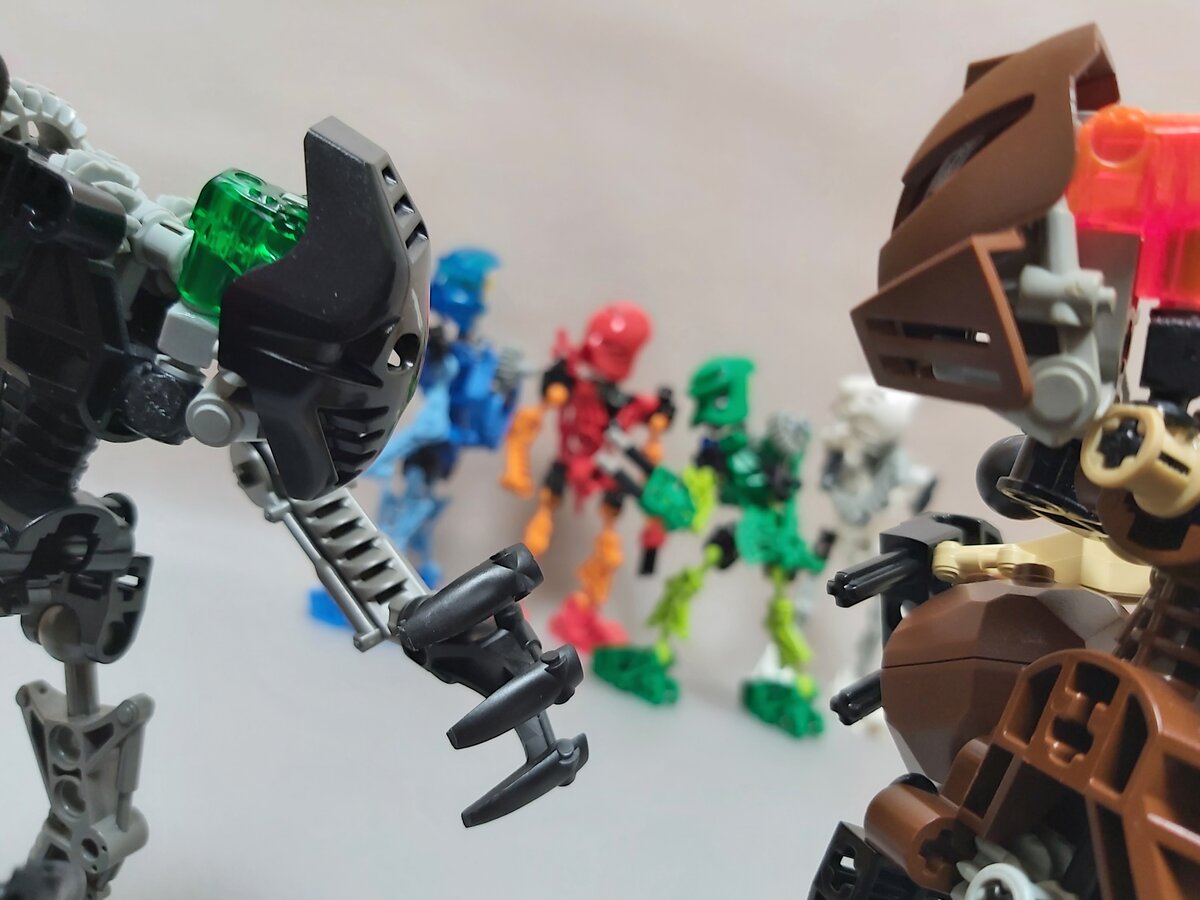
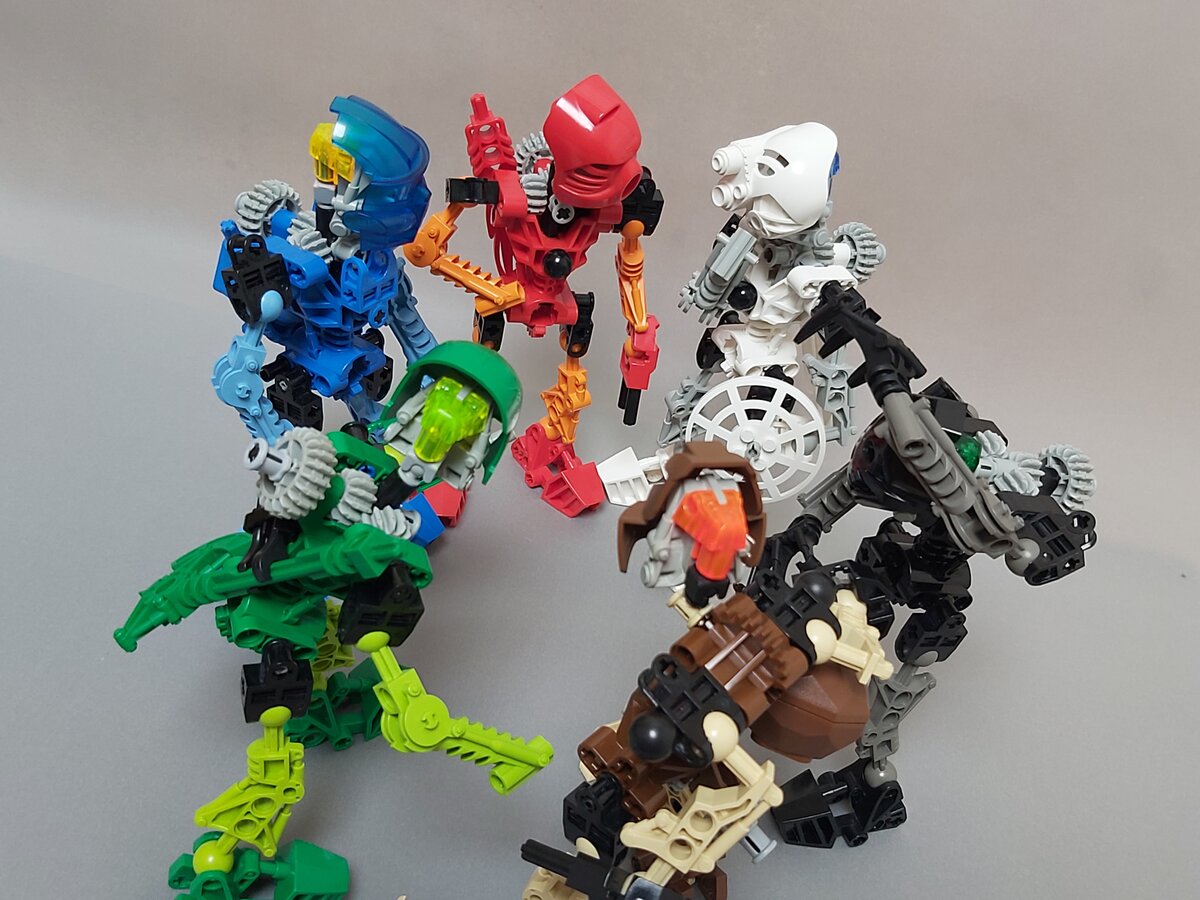
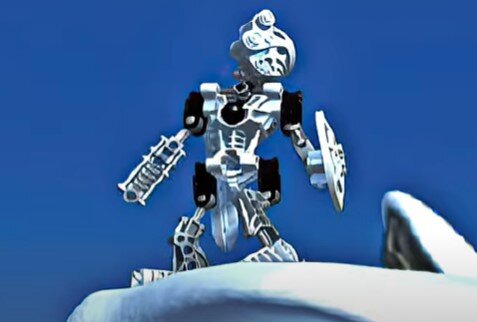
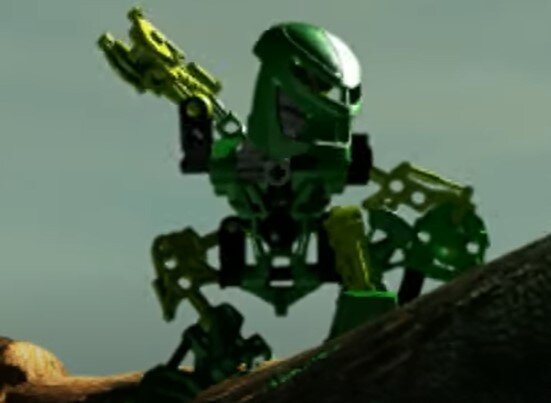
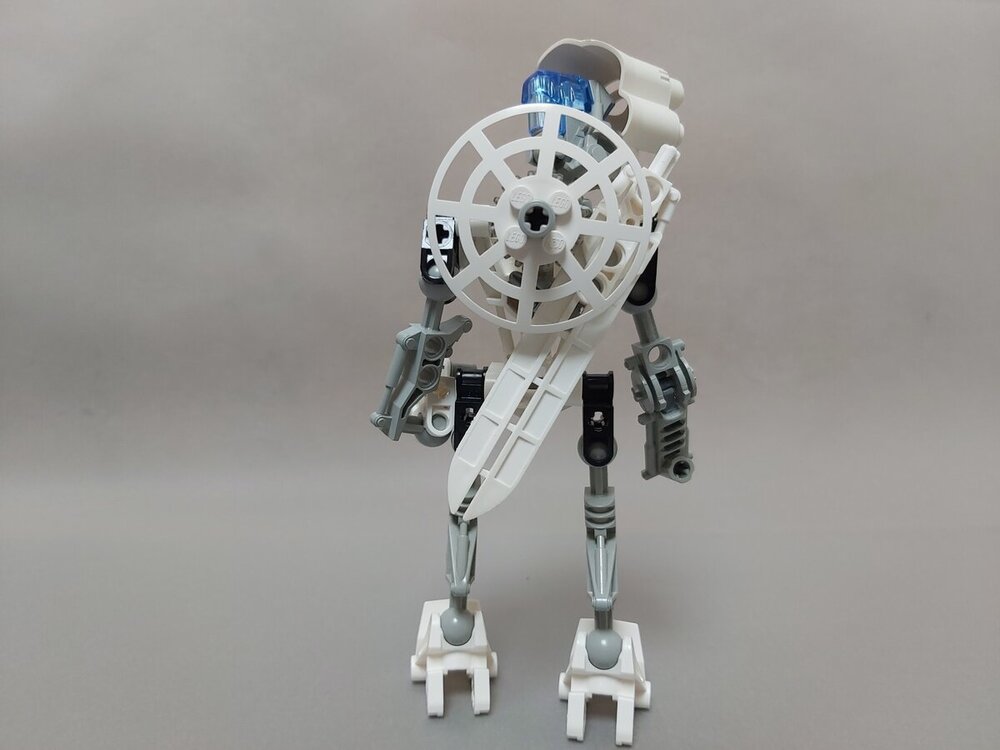
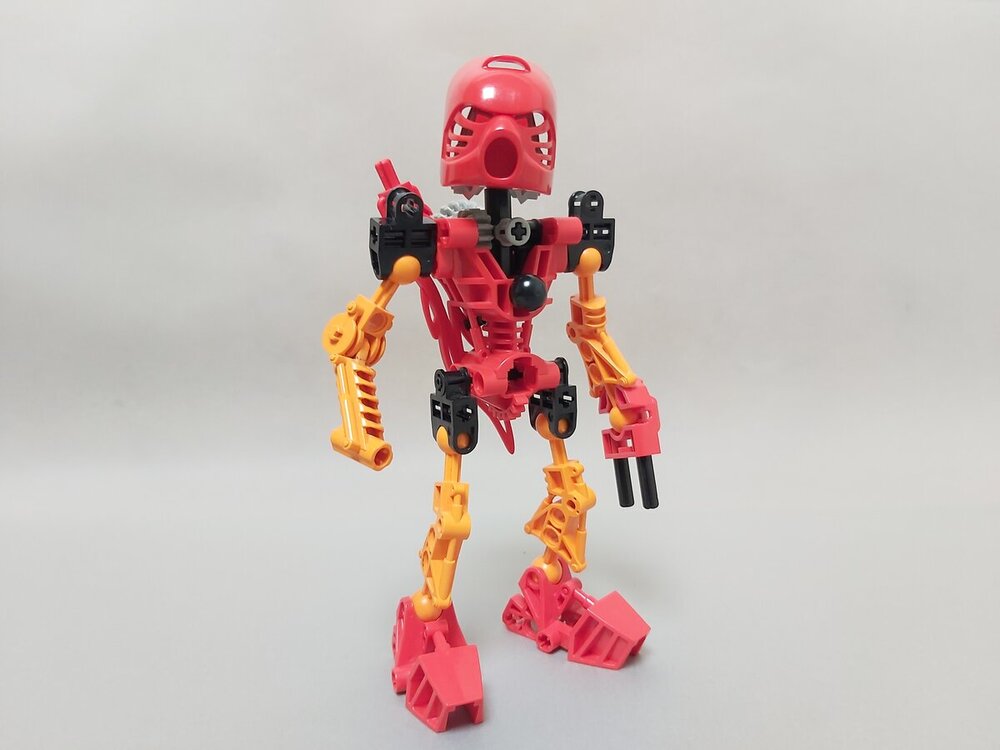
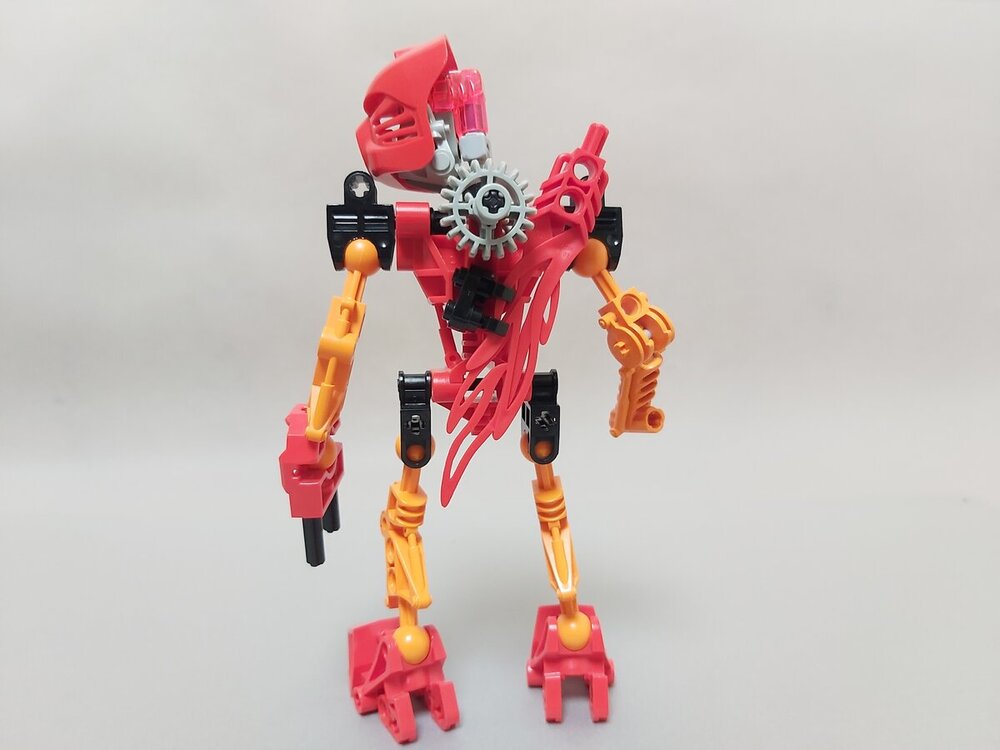
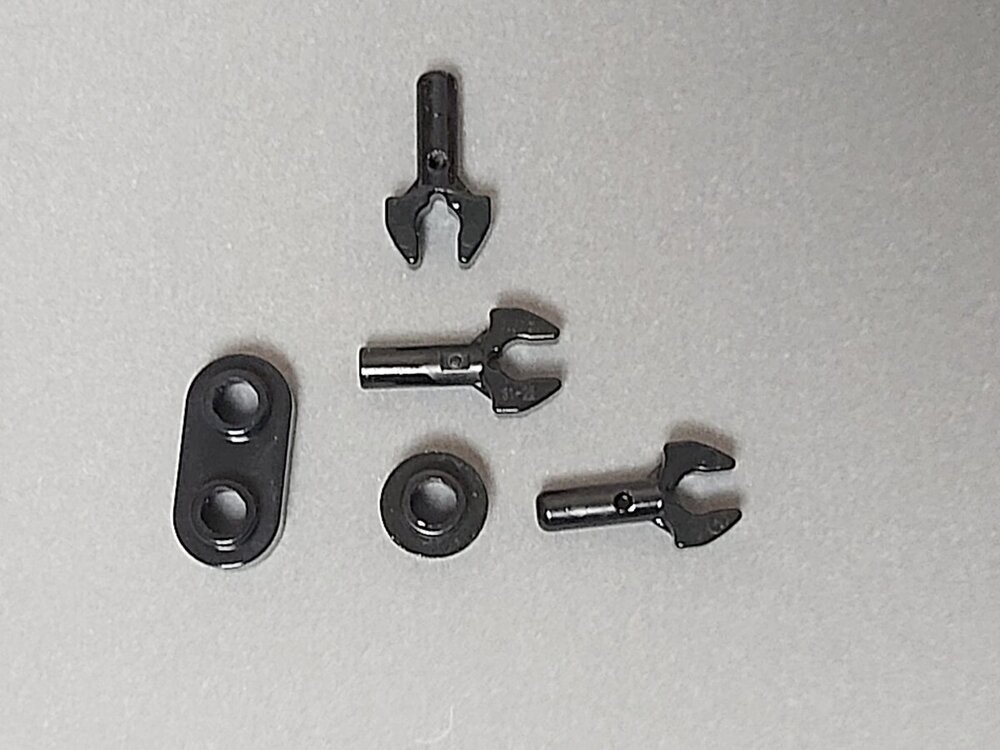
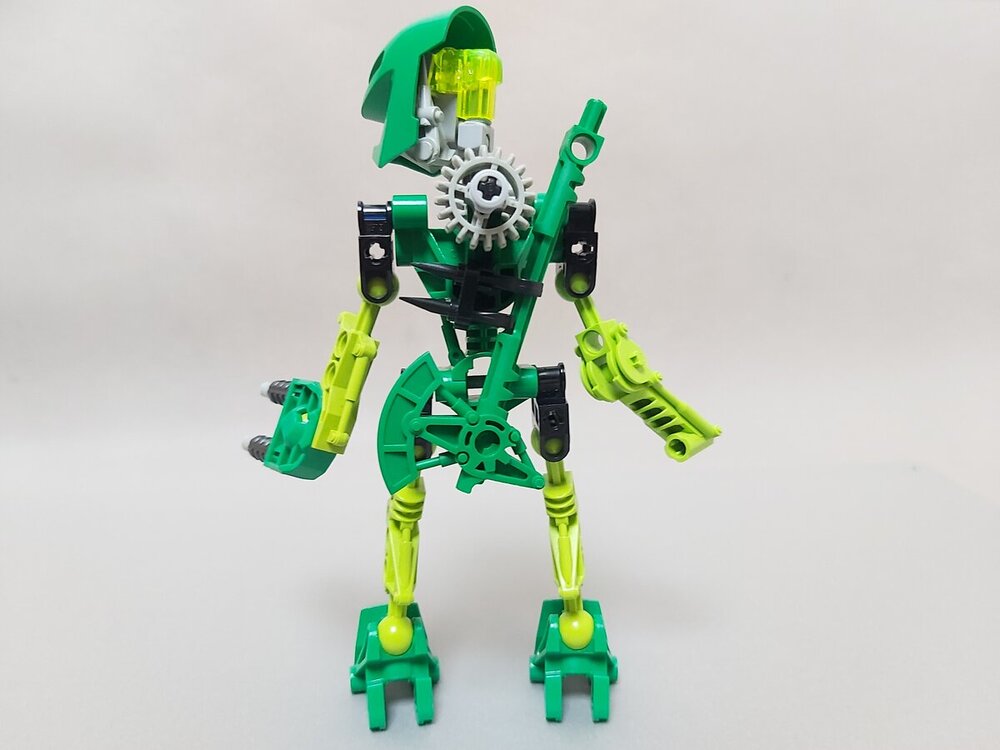
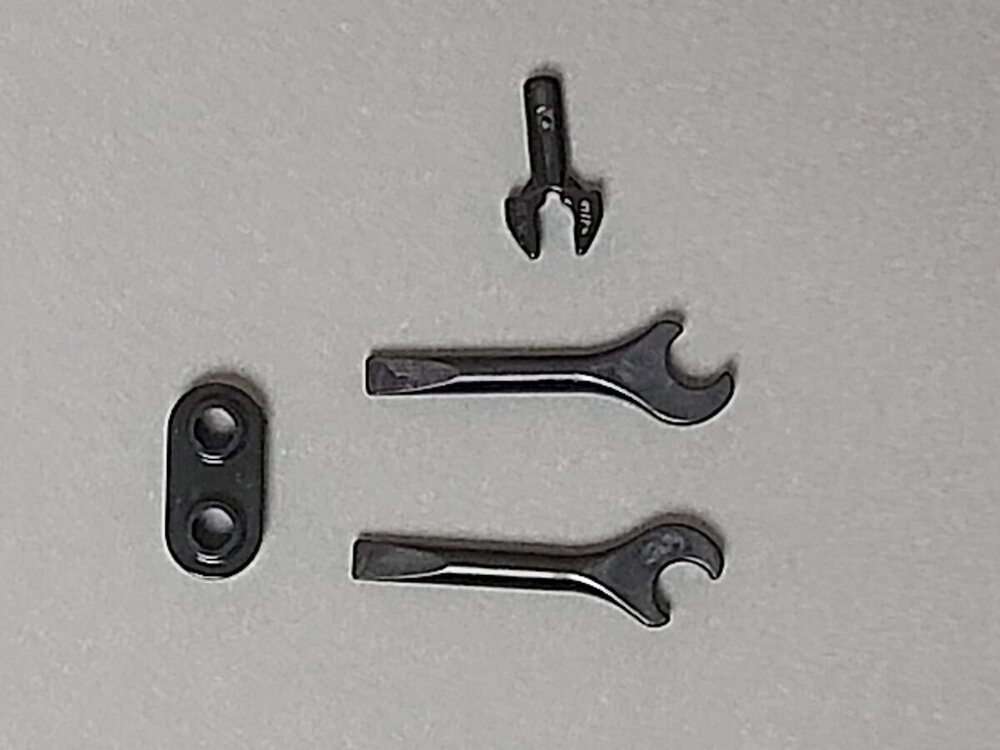
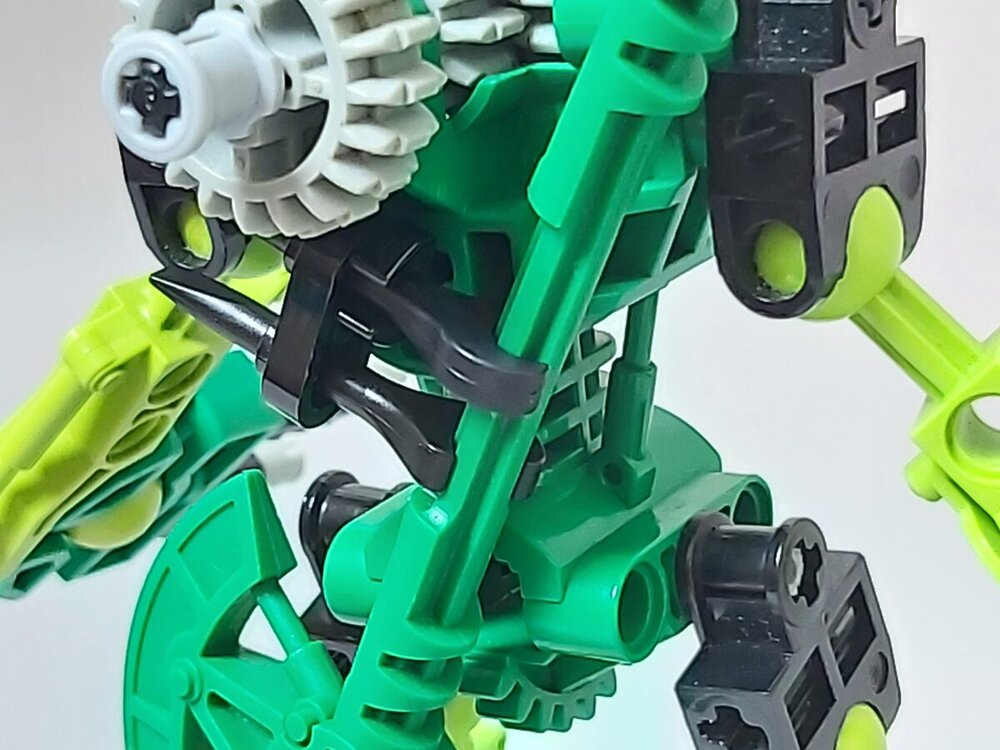
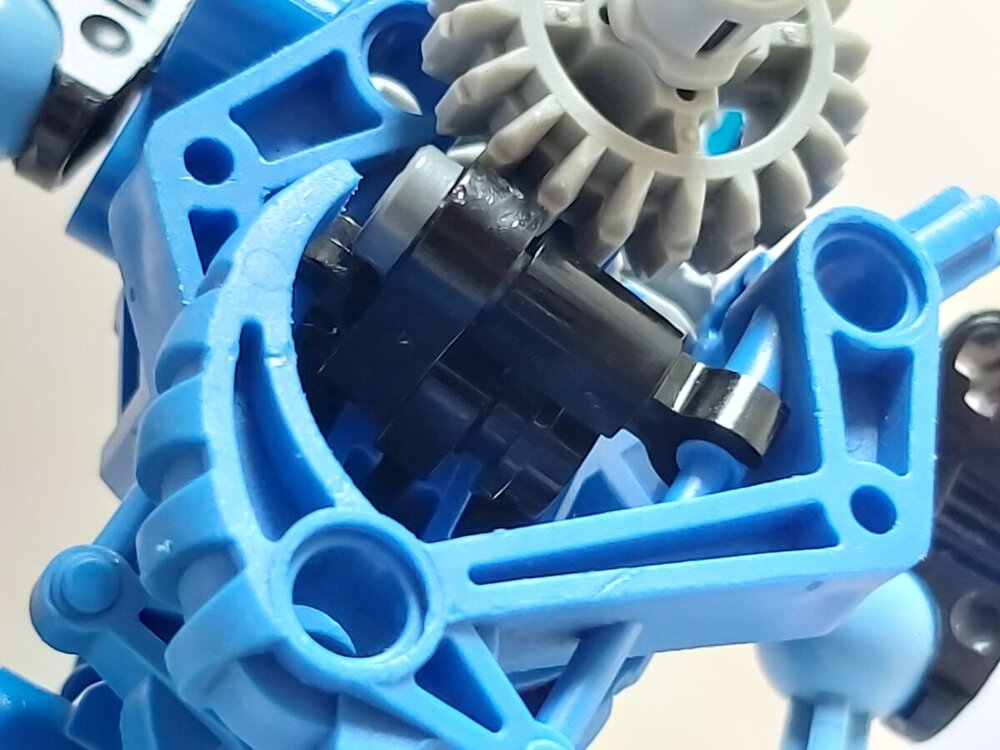
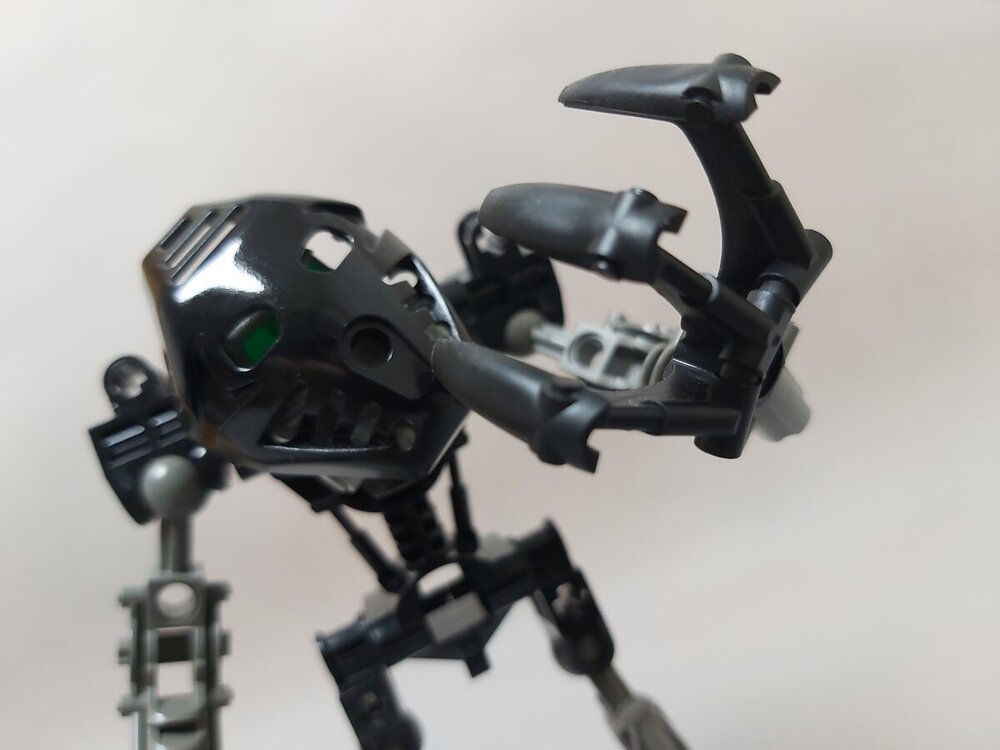
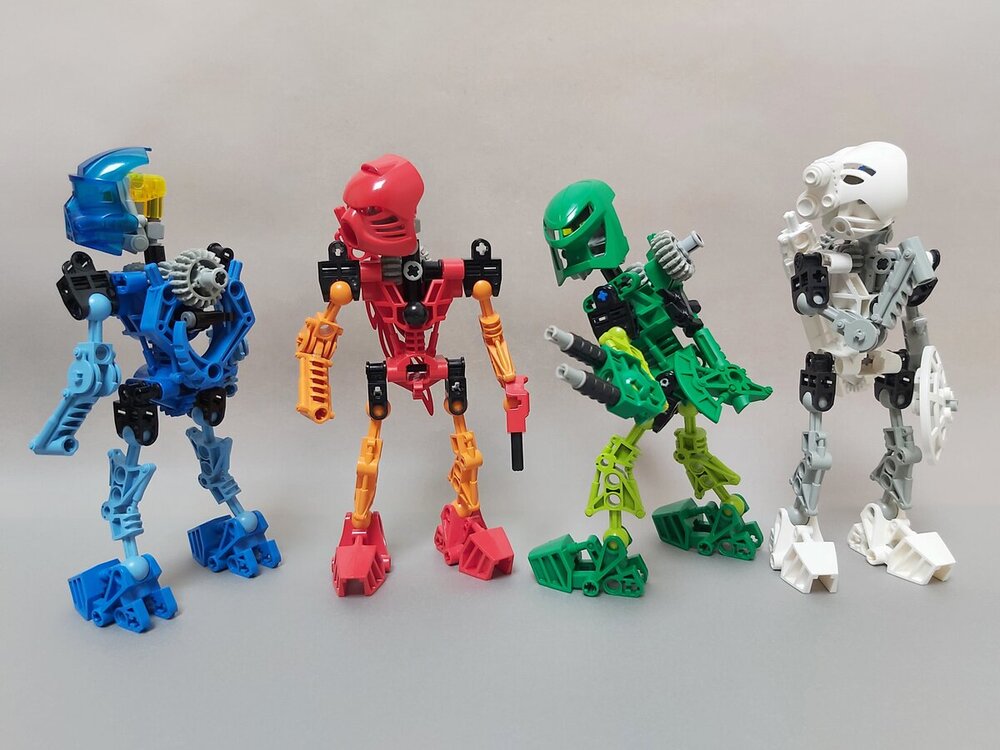
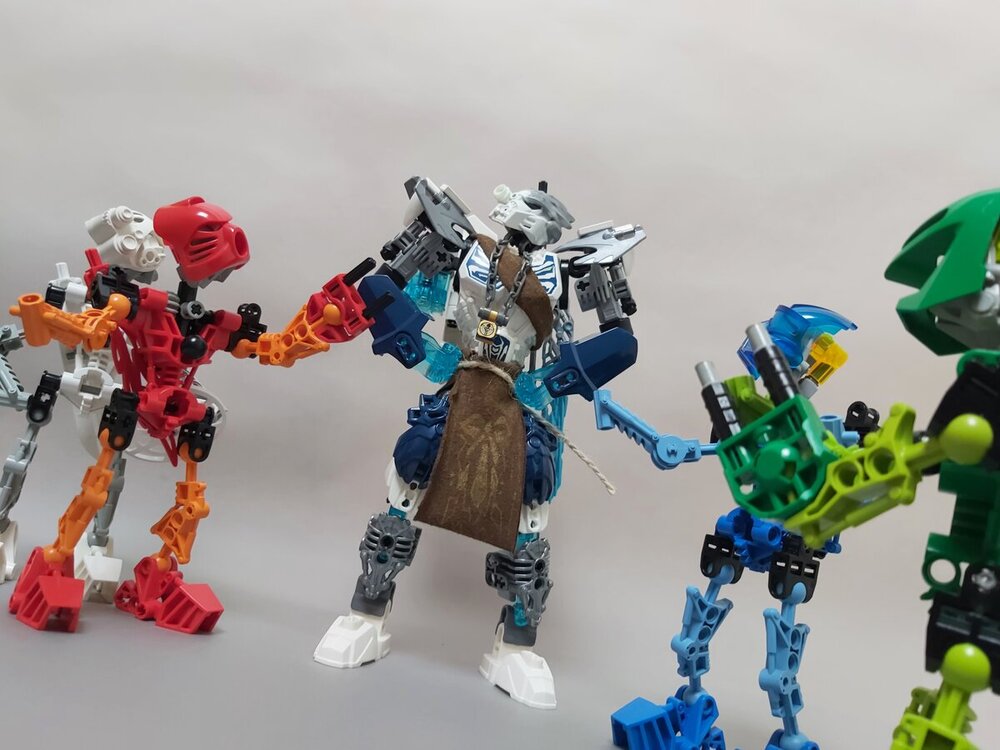
Hi! I'm Solaire, and I'm new here. Since BIONICLE is celebrating its 20th anniversary, I've decided to share some of my "modifications" to the legendary Toa team that started it all: the Toa Mata! I've made weapon holster for four of them, taking inspiration from those old videos. Here are some screenshots (the last one is not official but illustrates my point quite well) (from : BIONICLE: masks of power) The magic of CGI ... KOPAKA Like kopaka himself, this holster is simple yet effective: no illegal technics here. Here's the parts list and result: Then all you have to do is to insert it in the axe hole in his back: And voilà ! TAHU For Tahu there's a little trick: the holes on the fire sword are way too high. So I've used the thickness of the blade (which is the same as a plate for some reason) in conjunction with exo-force claws to hold it in place. And it's very secure! LEWA Lewa's holster was quite hard to figure out! There was no usable legal connection, so I had to think outside the box. Using two minifig wrenches I was able to simulate a hole the size of an axel. That configuration allowed the axe to hold securely. Be sure to push it as far as you can against Lewa's back to have maximum friction. GALI Soooo many prototypes for this one ! after considering using the hips for placement I decided to use the natural shape of the hooks to hide them around the back gear. It's way sleeker than my earlier attempts. Another illegal connection: using the piston detailing on the insides of both hooks, I was able to overlap them in a satisfying shape. The grey custom piece ( made from those parts that hold railways set inbox) is replaceable by a cut pneumatic hose of length 1:1 ONUA and POHATU There's nothing to store! Onua's claws ARE his hands ... that would be creepy. And Pohatu can hold his rock under his arm CONCLUSION One thing to note is that the gear functions are still perfectly usable. hooray ! So now, after twenty years of honourable service, our heroes can finally lay down their weapons and celebrate! while the four of them compare upgrades, Onua and Pohatu seem confused as to why it's such a big deal But There's still an important matter to discuss: what flavour will be the cake? If I know anything about them, it's that it's going to take a while. You want what ?! ... I guess MY work isn't over That's all for now! I'm always eager to learn and improve so feel free to share your opinion. PS: apologies if my phrasing seems strange. English is not my native language. ^^'


- 12 replies
-
- 6
-

-
- bionicle g1
- toa mata
- (and 2 more)