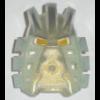
Takanuinuva Posted October 29, 2012 Share Posted October 29, 2012 I have found a way to attach the 4 armed Garmadon piece to a torso piece. Here are step by step instructions on it.Parts needed to do thishttp://www.brickshelf.com/gallery/takanuinuva/mc/Garmadon4armsLdd/attaching_4_armed_piece__1.pngStep 1 lie the torsos and legs on there backhttp://www.brickshelf.com/gallery/takanuinuva/mc/Garmadon4armsLdd/attaching_4_armed_piece__2.pngStep 2 attach the legs to the 4 armed torsohttp://www.brickshelf.com/gallery/takanuinuva/mc/Garmadon4armsLdd/attaching_4_armed_piece__3.pngStep 3 drag the legs out of the 4 armed torso till there the space away in the pichttp://www.brickshelf.com/gallery/takanuinuva/mc/Garmadon4armsLdd/attaching_4_armed_piece__4.pngStep 4 attach the normal Garmadon torso. As you see in the pic it doesn't line up all the way with the 4 armed torsohttp://www.brickshelf.com/gallery/takanuinuva/mc/Garmadon4armsLdd/attaching_4_armed_piece__5.pngStep 5 take the two red bricks and attach them to the feet as shownhttp://www.brickshelf.com/gallery/takanuinuva/mc/Garmadon4armsLdd/attaching_4_armed_piece__6.pngStep 6 remove the normal Garmadon torso and slide the legs onto the 1x2 brickhttp://www.brickshelf.com/gallery/takanuinuva/mc/Garmadon4armsLdd/attaching_4_armed_piece__7.pngStep 7 slide the 1x2 brick over so it lines up under the 4 armed piecehttp://www.brickshelf.com/gallery/takanuinuva/mc/Garmadon4armsLdd/attaching_4_armed_piece__8.pngStep 8 move the legs back over and attach the normal Garmadon toros. The 4 armed piece will now be lined up properlyhttp://www.brickshelf.com/gallery/takanuinuva/mc/Garmadon4armsLdd/attaching_4_armed_piece__9.pngStep 9 delete the red bricks and highlight all the pieces. The 4 armed part isn't attached to the normal torso so you'll have to select all the bricks by dragging over them with your mouse. Stand the completed torso upright and your donehttp://www.brickshelf.com/gallery/takanuinuva/mc/Garmadon4armsLdd/attaching_4_armed_piece__10.pngNote if this is posted in the wrong topic please move to correct topic. Quote I am Takanui Nuva. The Toa Nuva of Light I also go by Baron Von Brickenstein AFOL, Gamer and overall nice person. Link to comment Share on other sites More sharing options...
bonesiii Posted October 30, 2012 Share Posted October 30, 2012 (Firstly, not sure this belongs here, but anywho.)This is a much more roundabout way to do a standard non-snapping lineup in LDD. It's much easier to use lightsaber tubes or the like connected to whatever grip piece best fits the scenario, and drag a selection along the lightsaber tube. Gives you much more exact control. :)FYI. Quote The Destiny of Bionicle (chronological retelling of Bionicle original series, 9 PDFs of 10 chapters each on Google Drive): Part 1 - Warring with Fate | Part 2 - Year of Change | Part 3 - The Exploration Trap | Part 4 - Rise of the Warlords | Part 5 - A Busy Matoran | Part 6 - The Dark Time | Part 7 - Proving Grounds | Part 8 - A Rude Awakening | Part 9 - The Battle of Giants My Bionicle Fanfiction (Google Drive folder, eventually planned to have PDFs of all of it) Link to comment Share on other sites More sharing options...

Recommended Posts
Join the conversation
You can post now and register later. If you have an account, sign in now to post with your account.
Note: Your post will require moderator approval before it will be visible.